-
-
Log in to Viewpoint
-
-
-
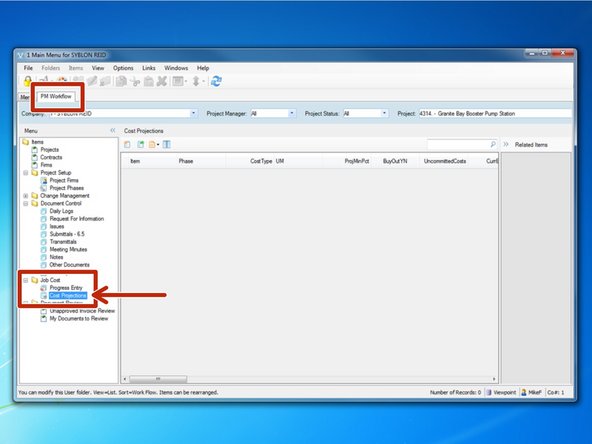
From the "PM Workflow" tab, select the "Cost Projections" program from the Job Cost folder.
-
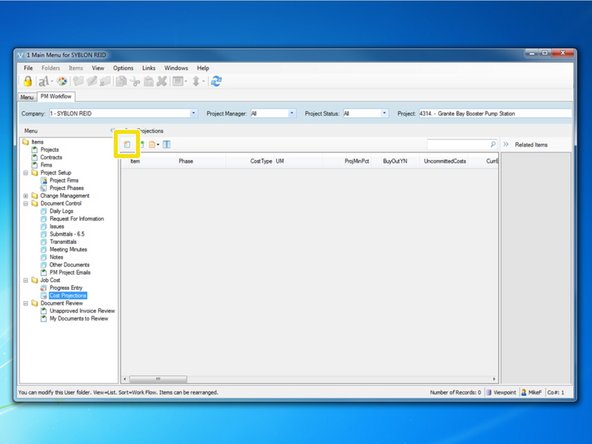
To begin calculating new projections, select the "Create New Item" icon.
-
-
-
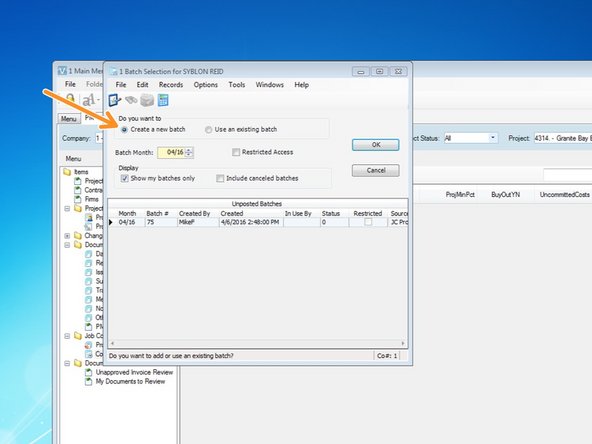
To create a new batch, select "Create New Batch". Type in the month that you want to complete your projections in and click "OK".
-
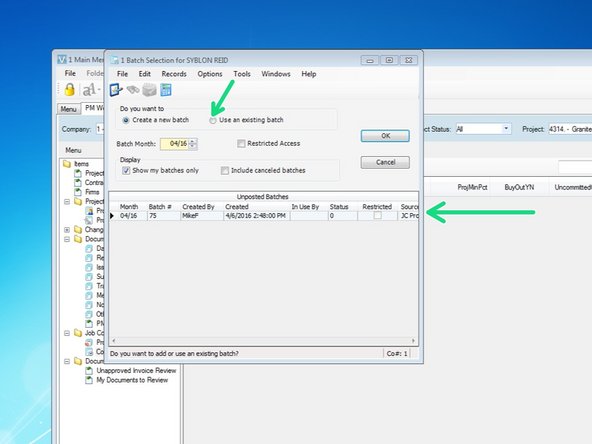
If you have an existing projection that you have been working on, it will show up below. To continue working on it, select "Use and Existing Batch", select the projection entry you want to continue working on, and select "OK"
-
-
-
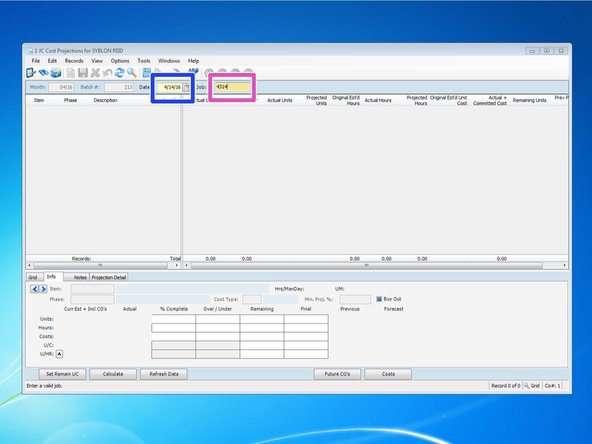
The date will automatically insert the current day's date. You can change by typing in a different date or selecting the calendar ion and choosing the day.
-
Select the "Job" field and type in your Job Number. Press the "Tab" key once complete.
-
-
-
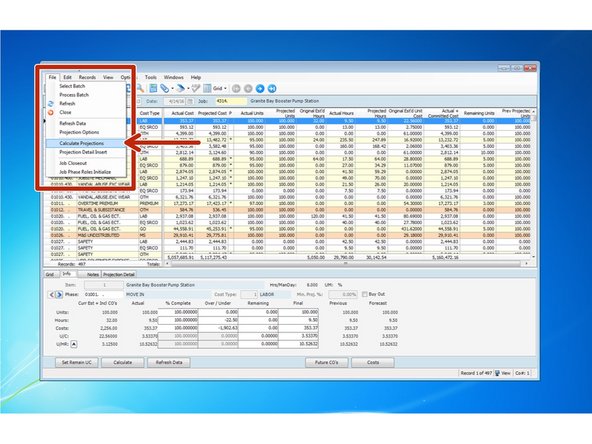
The first task to perform is to calculate your projections to refresh the cost data input since your last projection. "Calculating Projections" will tell Viewpoint what to do with your "plugged" costs from your previous projection.
-
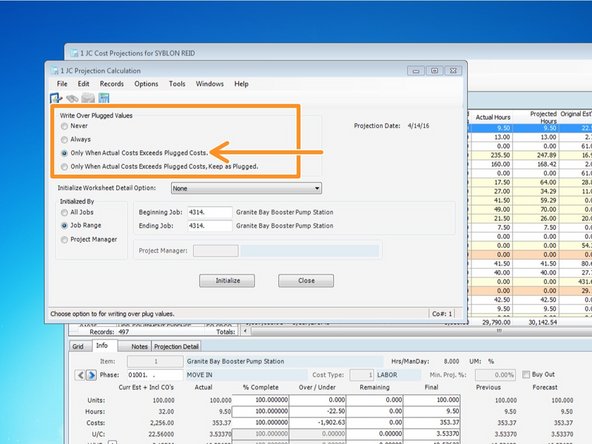
The large majority of the time, you should click on "Only when Actual Costs Exceeds Plugged Costs". What this will do is, if you previously overwrote a projected cost with a "plugged" cost, it will keep your plugged cost UNLESS your actual cost exceeds your plugged cost. In that case, it will keep your actual cost.
-
When complete, click "Initialize".
-
-
-
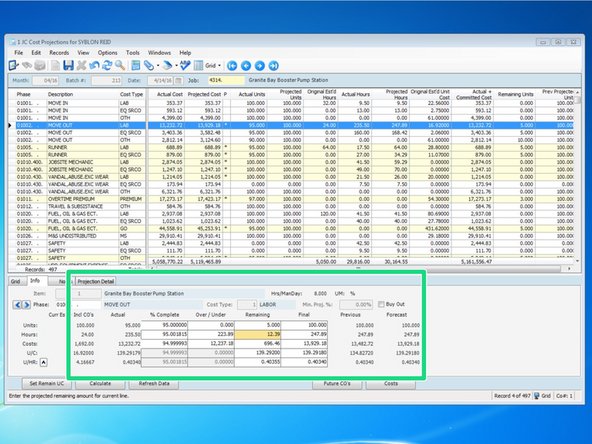
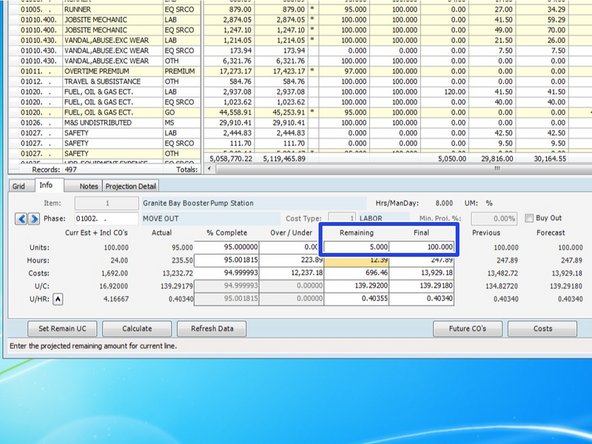
Select the row that you want to make adjustments to.
-
In the graph at the bottom, you can see what the projected costs and hours are. Your projections are based off of the quantities you claim. The more accurate your claimed quantities, the more accurate your projections will be. For more information on claiming quantities, see How To Claim Quantities
-
-
-
First, you can see what your estimate's units were as well as any budgeted increases in units from Change Orders. what your currently amount of completed units is.
-
In the middle area is where you can make changes. Your Remaining and Final units are based off of your claimed units completed. For tasks with units of measure such as LF, EA, CY, or SF, you can adjust these Remaining and Final units to what you actually expect to complete.
-
At the end of a project, this is where you need to go back and put in actual units installed. This will give the estimating department important unit production information based off actual units installed to use on future work.
-
-
-
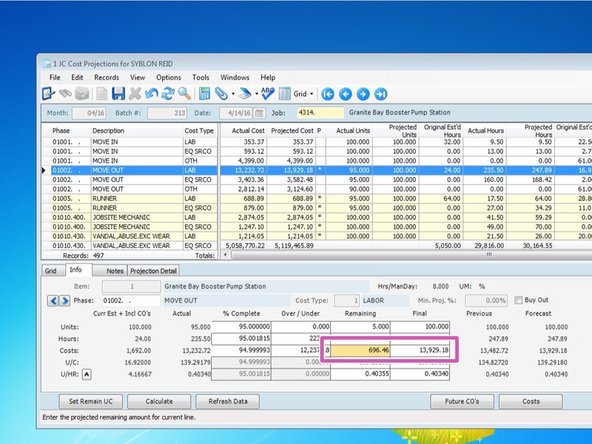
Next you can make an adjustment to the "Remaining" or "Final" cost. Making an adjustment in one will automatically update the other field.
-
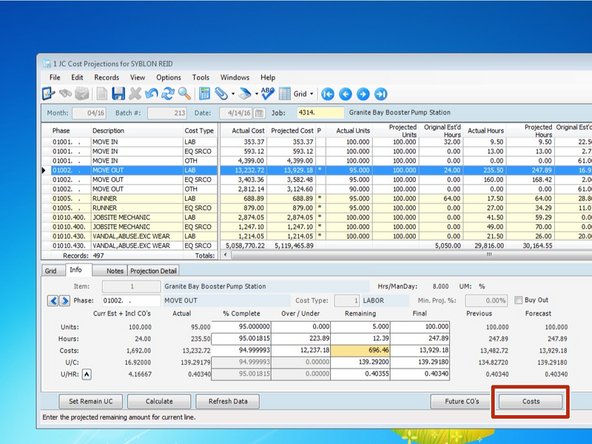
To see what costs have already been charged to your project and included in the "Actual" "Costs", click on the "Costs" button.
-
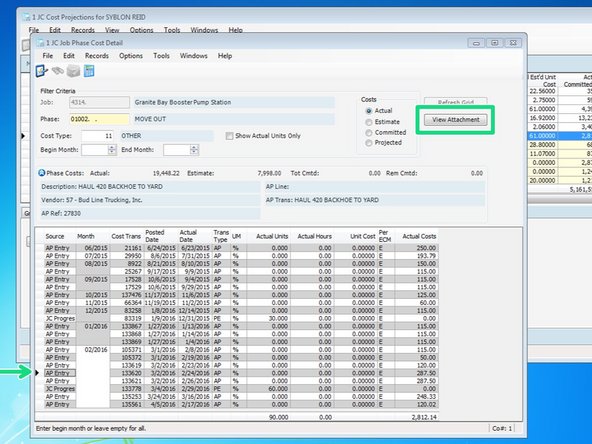
You can see all charges charged to that phase code and cost type. For A/P items, you will also be able to see the actual invoices if the "View Attachment" button becomes clickable.
-
-
-
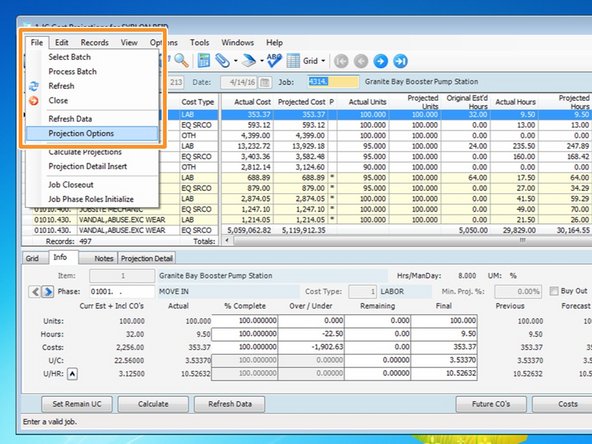
To filter the amount of records shown, you can select "File" ==> "Projection Options".
-
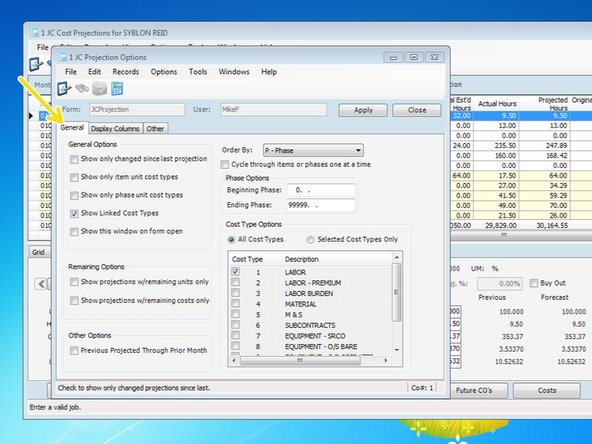
From the "General Tab", you can select from a lot of sorting options: you can view by sorting from a range of phase codes, you can sort by Cost Types, and you can select from among many other helpful options.
-
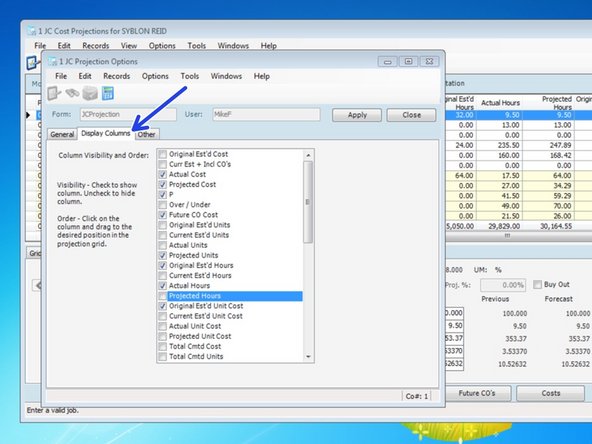
You can also click on the "Display Columns" tab to see an option of columns to display from the projection program's main menu.
-
Once complete, be sure to click "Apply".
-
-
-
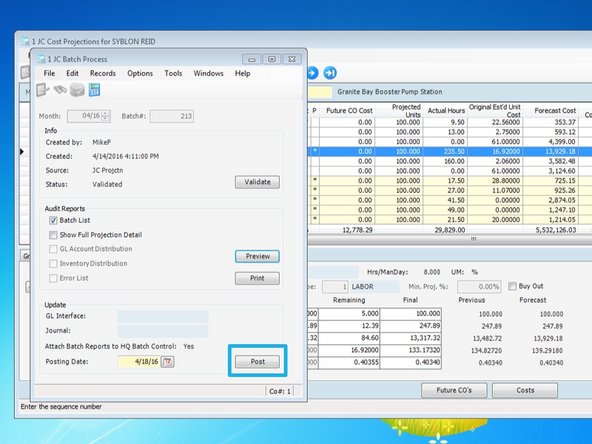
To process the batch and update Viewpoint with the new projections, click on "File" ==> then "Process Batch".
-
Click on "Validate".
-
Click on "Post".
-