-
-
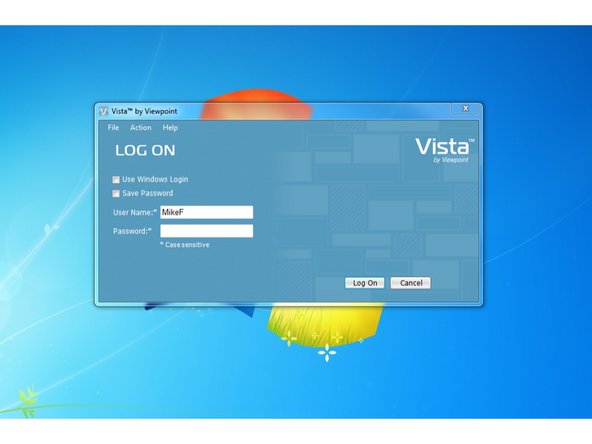
Log in to Viewpoint
-
-
-
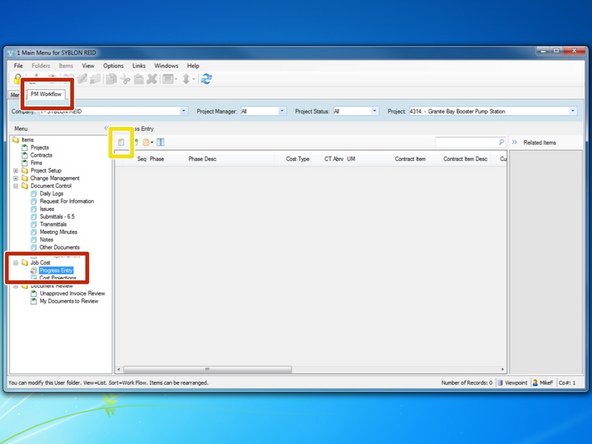
From the "PM Workflow" tab, select the program "Progress Entry"
-
To begin claiming quantities completed for a new period, select the "Create New Item" icon.
-
-
-
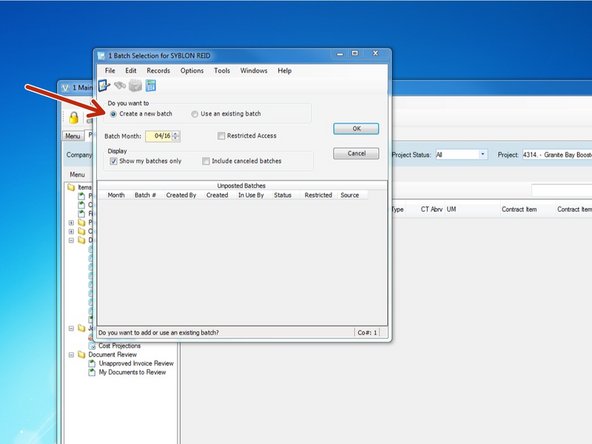
To create a new batch and claim new quantities, select "Create a new batch". If you wish to continue with an incomplete batch, you can select "Use an existing batch", then select which batch you want to continue working on.
-
IMPORTANT - Your batch month is ALWAYS the month in which the period you are claiming quantities for begins. This is important to keep in mind when the month changes in the middle of the week. If claiming quantities for a period ending on Saturday 04/02/16, the batch month should still be 03/16
-
-
-
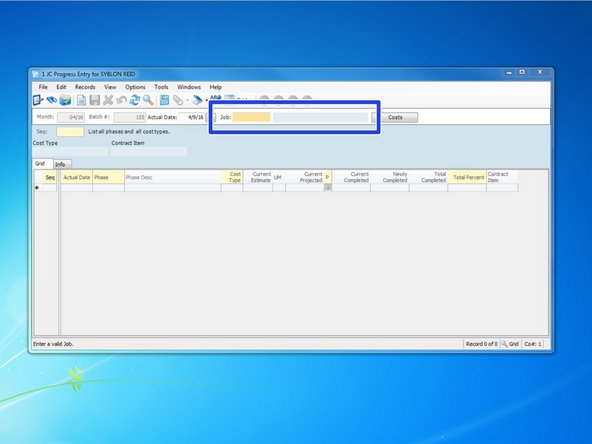
Input the period ending date that you want to claim quantities for. Labor periods end on Saturdays so when claiming weekly labor quantities, enter or select the Saturday for the period you want to claim production quantities for.
-
Enter the job number. Press the "Tab" key.
-
You can use the "Tab" key to move the cursor in to the next available field.
-
-
-
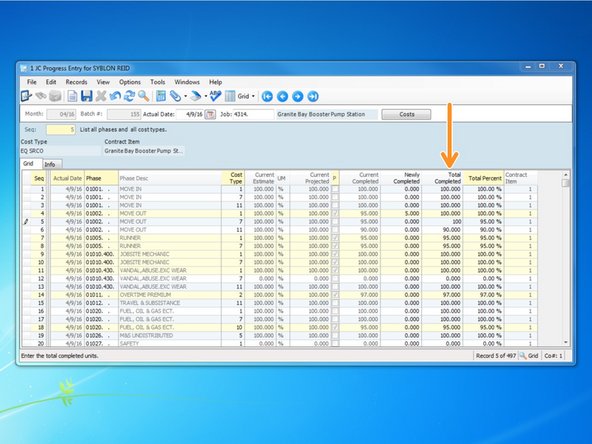
You can insert the quantities you have completed in either one of the three columns.
-
Changing a quantity in one column will automatically calculate out the other two columns.
-
Labor and equipment production should be claimed weekly, thru a "period ending date" each Saturday. At a minimum, all other quantities, including materials, M&S, subs, and other should be claimed monthly. Quantities can be claimed more frequently if desired.
-
-
-
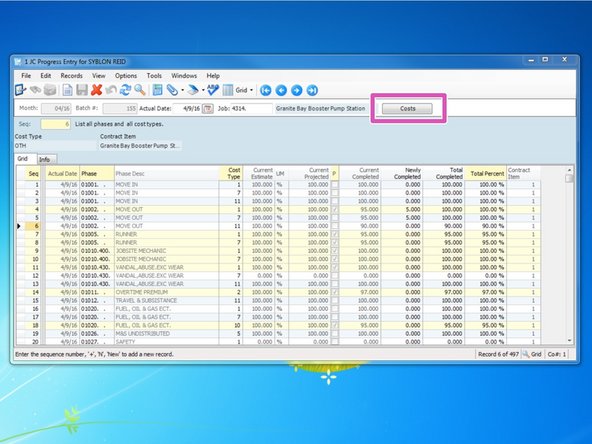
You can view what costs have been charged to each phase code by clicking on the "Costs" button.
-
-
-
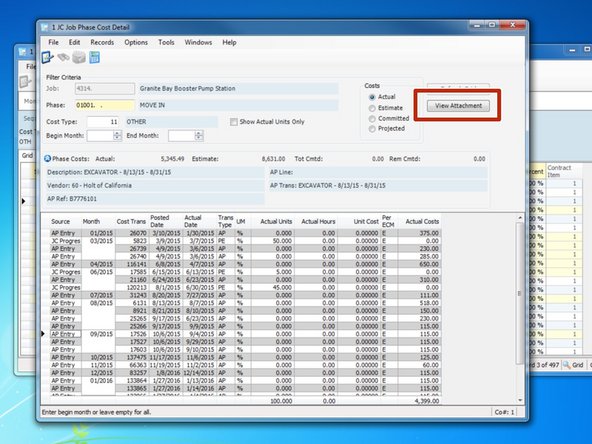
From this menu, you can see what costs have been charged to each phase code to date. You can narrow your results down by entering beginning and ending months.
-
For costs entered in through Accounts Payable, the button "View Attachment" becomes highlighted. You can click on the button to bring up the Attachment Form screen and select on the attachment to view the invoice.
-
-
-
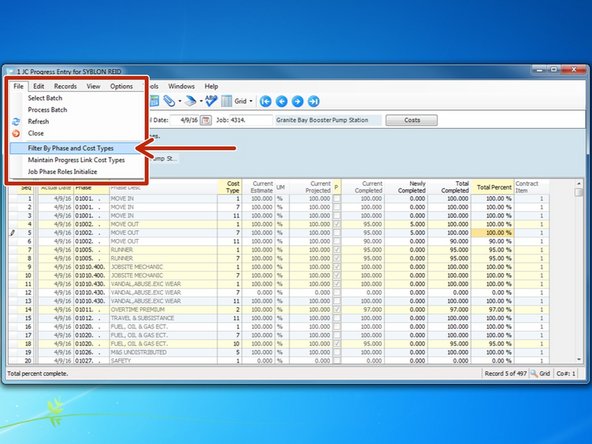
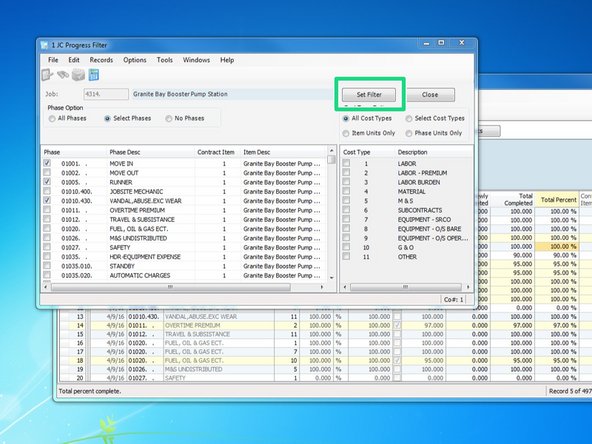
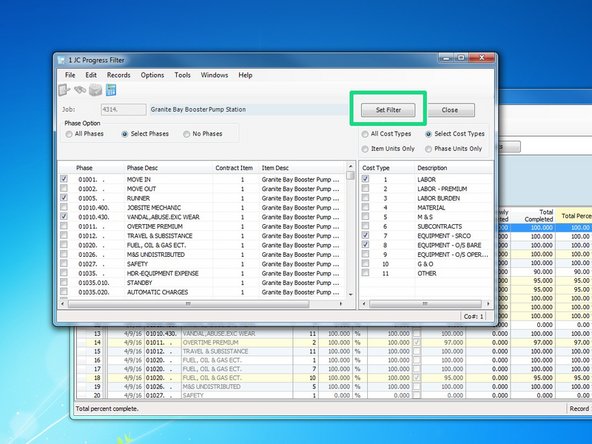
If you want to narrow the phase codes down, select File ==> Filter By Phase and Cost Type.
-
-
-
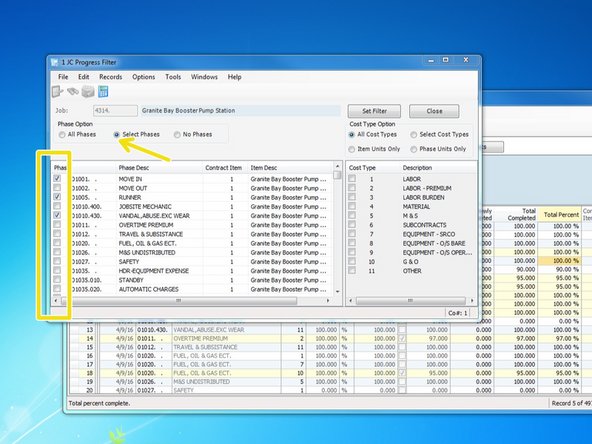
You can select "Select Phases" and go through and check which phase codes you want to see. If you want to see all phase codes, just click on "All Phases".
-
Once complete, click on "Set Filter"
-
-
-
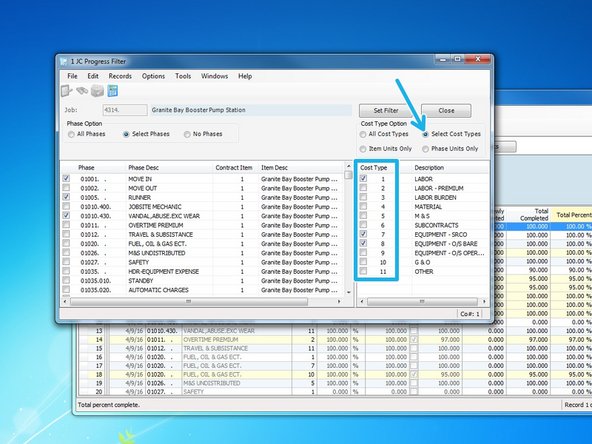
If you want to filter by cost type, first click "Select Cost Type", then click on what cost types you want to see.
-
Once complete, click on "Set Filter"
-
-
-
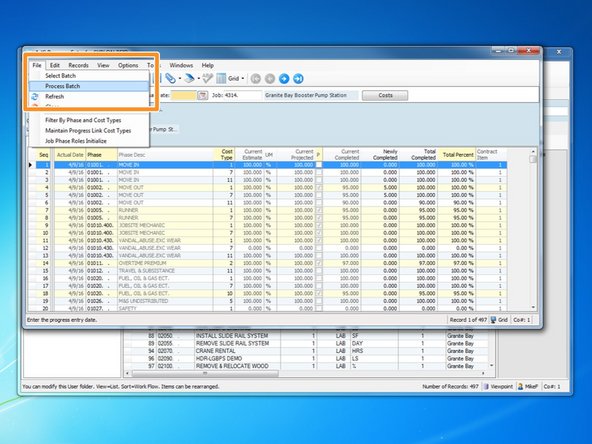
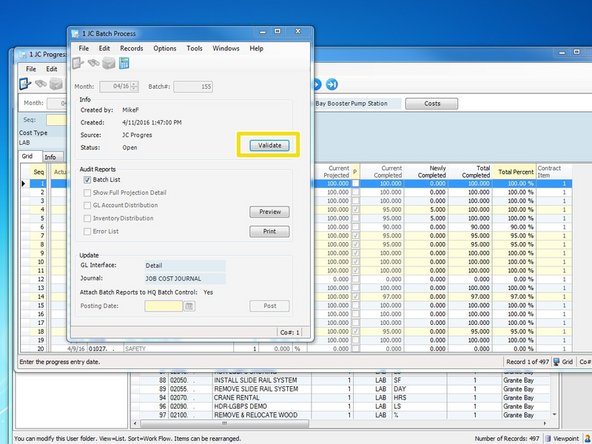
Once you have updated all of your quantities, you need to post them in to Viewpoint. To do this, select "File" ==> "Process Batch"
-
-
-
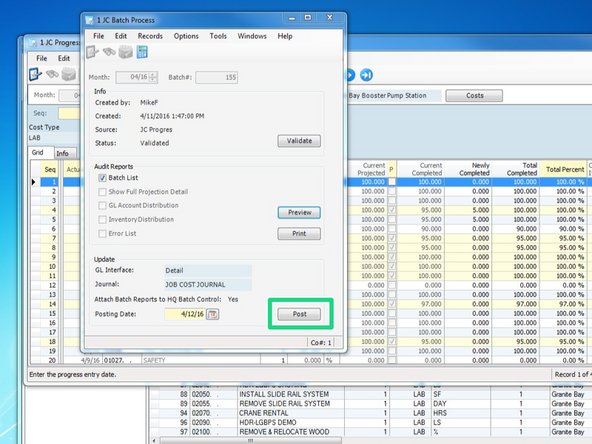
Click on the "Validate" button.
-
Then click on "Post" button.
-
-
-
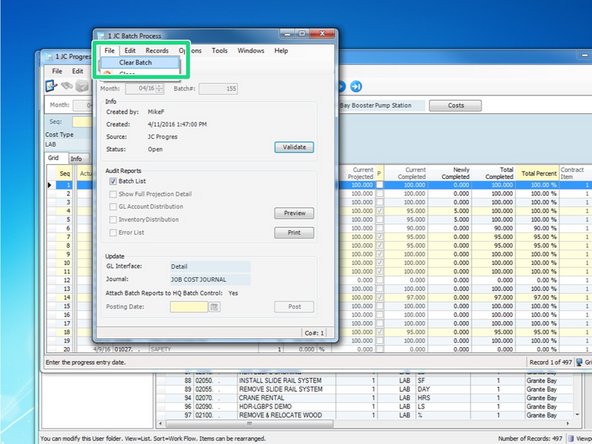
If you have created a batch that you no longer want to use, you need to cancel that batch. Do that by clicking on "File" ==> "Process Batch".
-
Then from the Batch Process window, select "File " ==> "Clear Batch" and then verify by clicking "Yes".
-