-
-
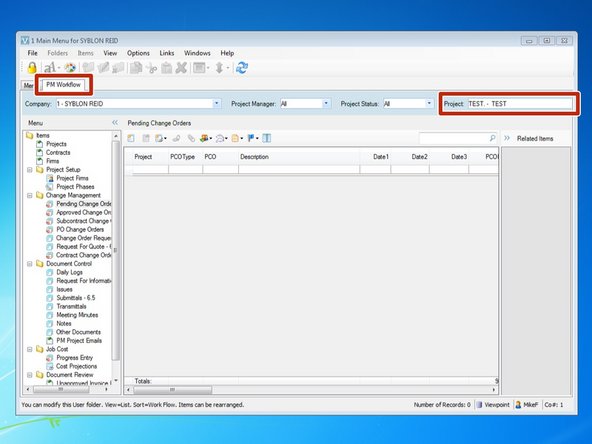
Log in to Viewpoint
-
-
-
From the "PM Workflow" tab, select your project.
-
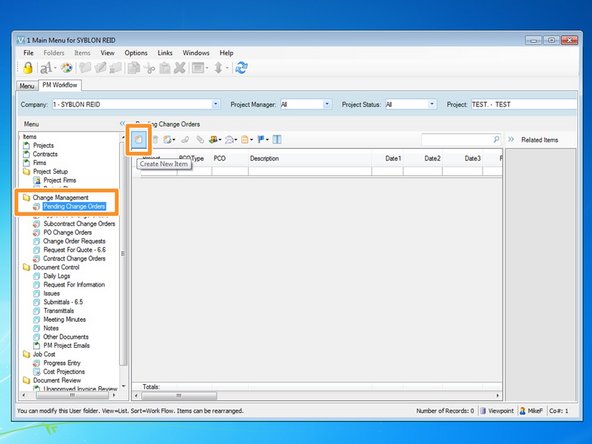
From the Change Management folder, select the "Pending Change Orders" program and click on the "Create New Item" icon.
-
-
-
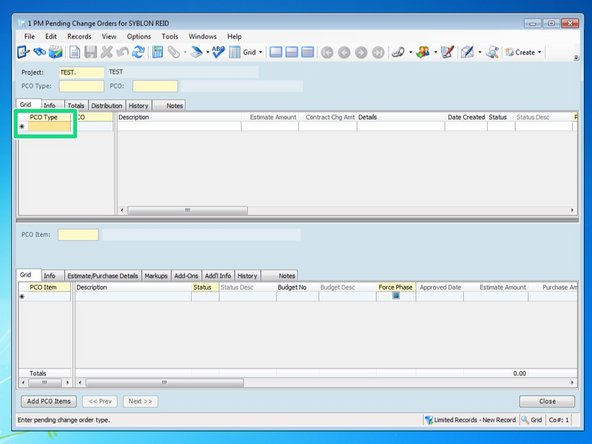
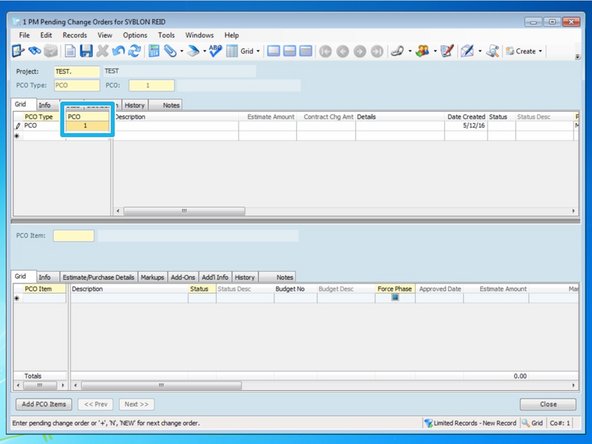
Viewpoint will automatically open the program and direct you to the "Grid" tab. To begin your PCO from this tab, first you need to enter a "PCO Type" for the change order. If you press the F4 key, you will see a list of types to choose from.
-
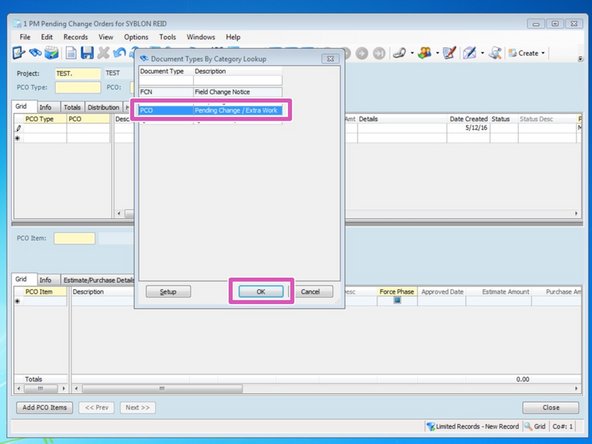
From the look up screen, there are a few types to choose from but most extra work should be classified as simply a "PCO" type. Select the type and press "OK"
-
After selecting from the Lookup menu, Viewpoint will automatically create the next available PCO number. Having all of your PCO Types the same will ensure that all PCOs will have their own PCO number. You can have the same number PCO if your PCOs are different PCO Types.
-
-
-
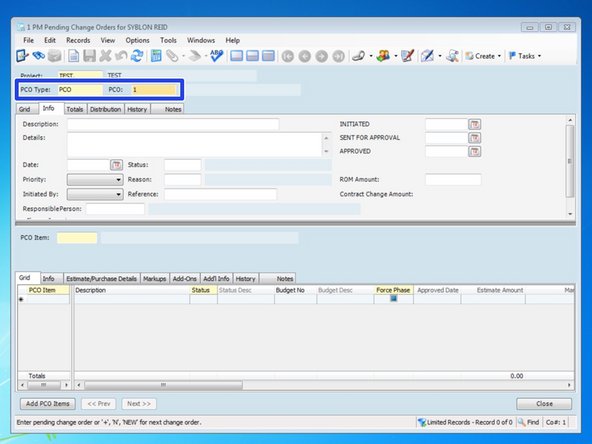
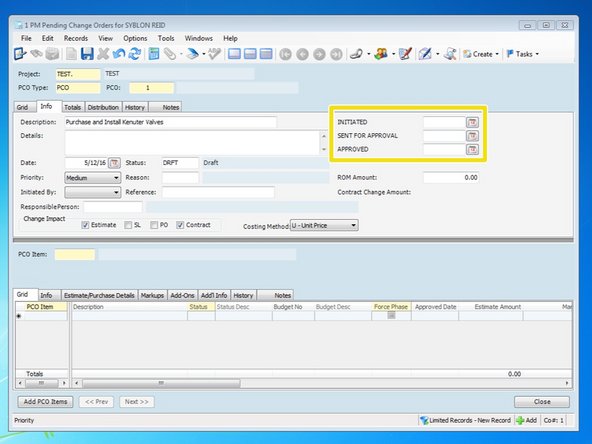
The "Info" tab is the easiest tab to enter all the information in. You can also create the PCO from this tab by entering the "PCO Type" as well as the "PCO" number. If you created your PCO from the "Grid" tab, it will be easiest to enter in the remaining information from this "Info" tab.
-
Although from the "PM Workflow" tab you should select your Project, you should always double check that you are working within the correct Project.
-
-
-
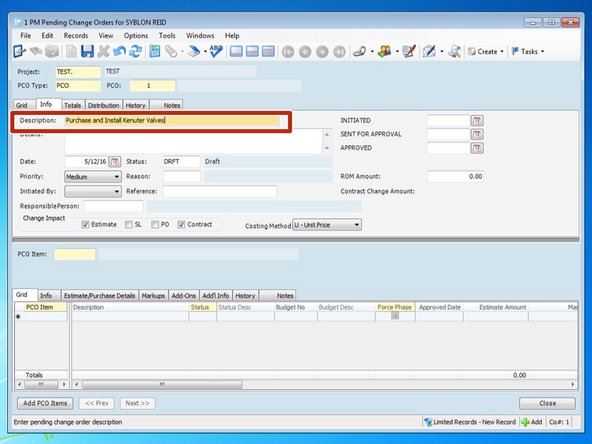
Enter a description for your PCO.
-
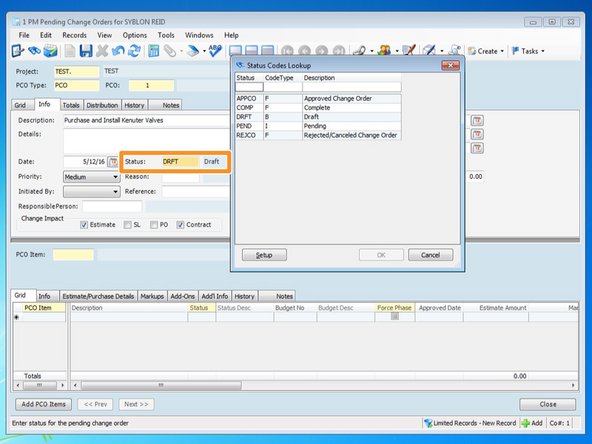
When the PCO is created, the status will default to "DRFT". If you want to change, from the "Status" field, you can type in the status abbreviation or press the F4 key. Select one of the statues available and press "OK".
-
-
-
Insert the dates for this PCO. You can either enter the date or click on the icon to select from a calendar.
-
-
-
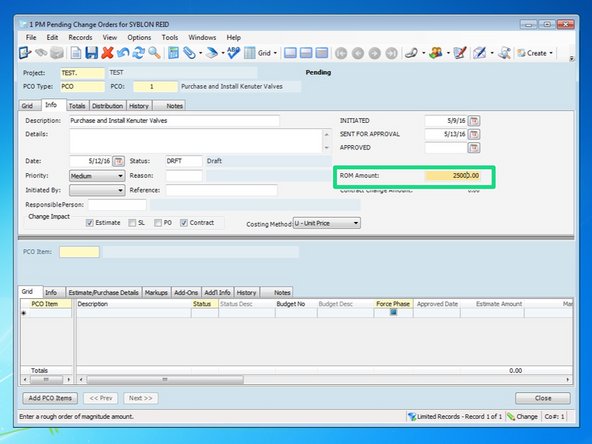
If you want, you can enter in a Rough Order of Magnitude for this PCO.
-
Besides the status, you can add more detail in any of these other fields although it is not necessary.
-
"Change Impact" and "Costing Method" will automatically default to these values and should be left alone.
-
-
-
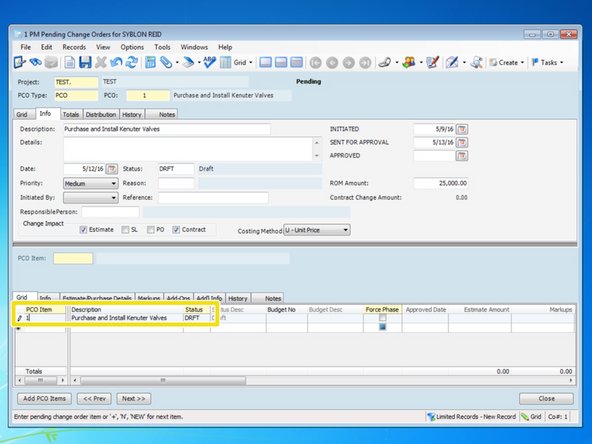
Once the PCO is created, you need to begin adding the Items that make up the PCO. A PCO should have at least one item but if the PCO covers many different items or scopes, you can add more items for each. From the "Grid" tab, type in "1" in the "PCO Item" column and the description and status will default to the values of the main PCO.
-
-
-
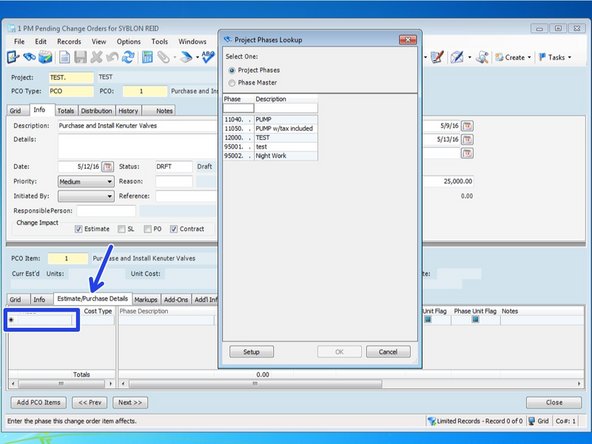
From the "Estimate/Purchase Details" tab, you can enter in the first phase code associated with this item. You can also press the F4 key to see Viewpoint's lookup menu to view a list of Project Phases. Also, add the cost type for that phase code.
-
If you want to create a new phase code, you can do so here by typing in the new phase code and description. Once the PCO is approved, becomes an Approved Change Order and is interfaced with the budget, it will create a new phase code.
-
If you need to begin claiming time or invoices against a new phase code prior to this change order being approved, you will need to first create the phase code. For help on creating phase codes, review the guideline "Creating Project Phases".
-
Creating a new phase code through the "JC Project Phases" program is the best way to add a phase code. You can create all the cost types and select the unit of measures. If you set it up with quantity as well, any quantity you add to this PCO item will be in addition to any quantities you initially set up.
-
-
-
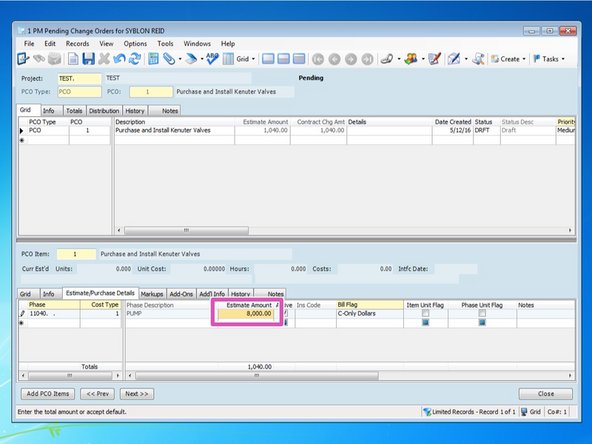
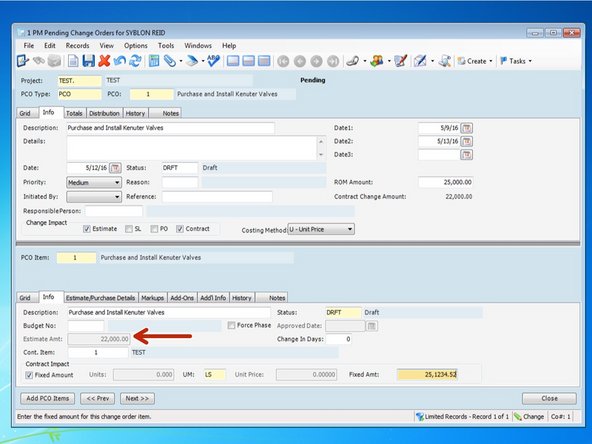
Add the "Estimate Amount" for this item's cost type.
-
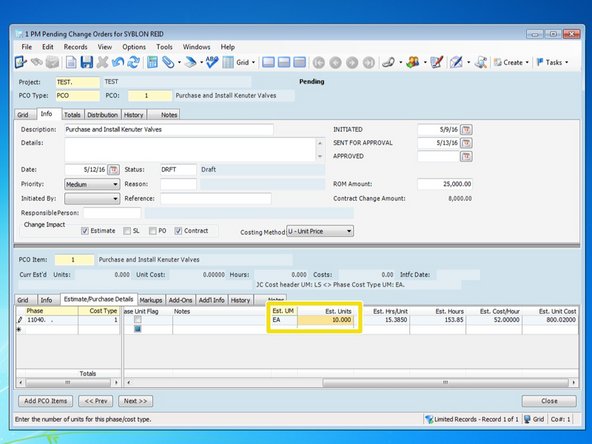
If your Unit of Measure if something that can be quantifiable (like EA or SF as opposed to LS), you can enter in a new "Est. Units" quantity that will be in addition to any quantities that are originally set up for this phase code.
-
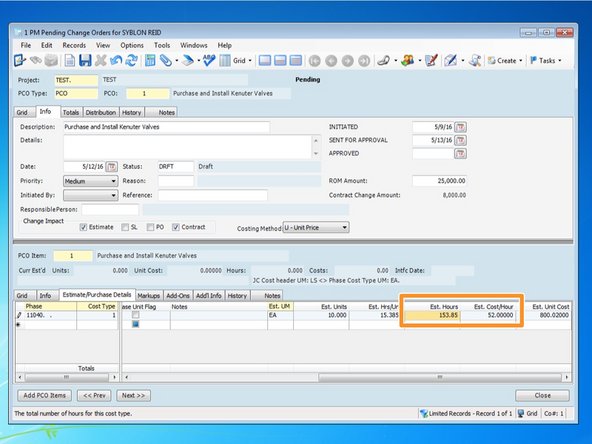
You can also add unit production information if you enter "Est. Hours". Entering in a value for one will automatically calculate the other values.
-
Any values added to this Phase Code will be in addition to any values originally set up in the budget.
-
-
-
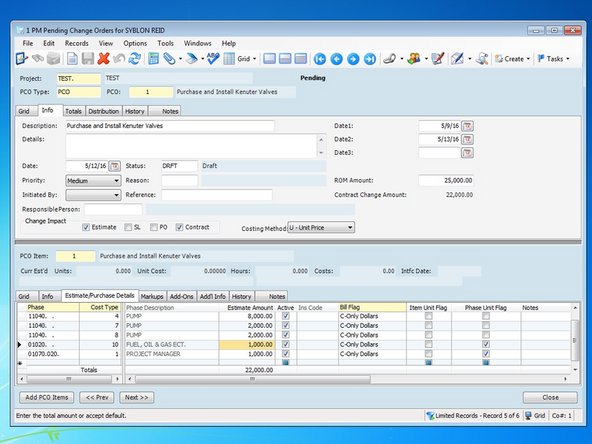
Finish adding all associated costs with this Item.
-
You can have multiple phase codes associated with one Item. For example, a change order Item can have money in it for Fuel and for Project Management. Insurances and bonding will automatically be calculated.
-
-
-
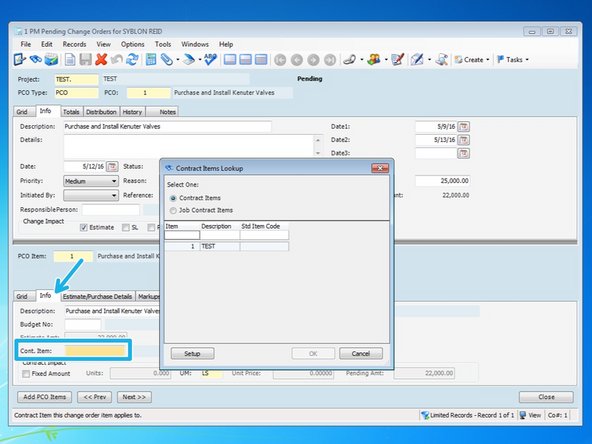
From the "Info" tab, first enter the Contract Item. This is typically "1" but if you were to set up your schedule of values in Viewpoint, you could assign it to a corresponding pay item. Press the F4 key if you want to view available items.
-
-
-
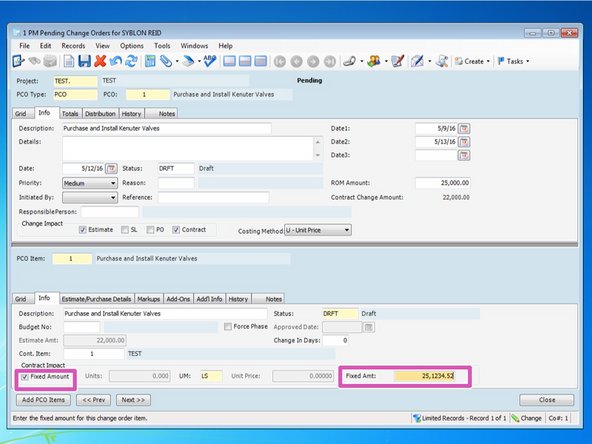
Click the "Fixed Amount" box and in the "Fixed Amt" field, enter the total of your PCO Item.
-
Viewpoint will try and estimate what it thinks your contract value should be based upon predetermined markups and add-ons. Be sure you check "Fixed Amount" and type in the actual amount of the change order.
-
Once all of your Items are entered, pending change orders can be seen in certain reports for your project. Once it is sent to the client, you can go back and change the status as well as change the date for when it was sent for approval.
-
Once the PCO is returned, you can change the status of the PCO and make any corrections you may be required to for the client. Approving the PCO here only allows us to access it from the Approved Change Order program. Approving the PCO here won't interface and integrate anything to Viewpoint.
-