-
-
Log in to Viewpoint
-
-
-
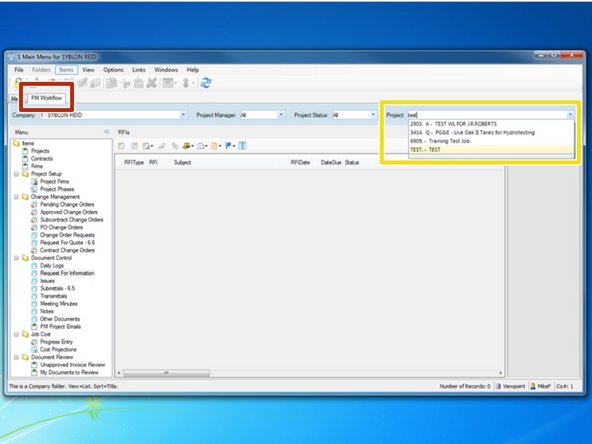
Select the "PM Workflow" tab
-
From the "Project" menu, begin typing in your job name or job number and select your project.
-
-
-
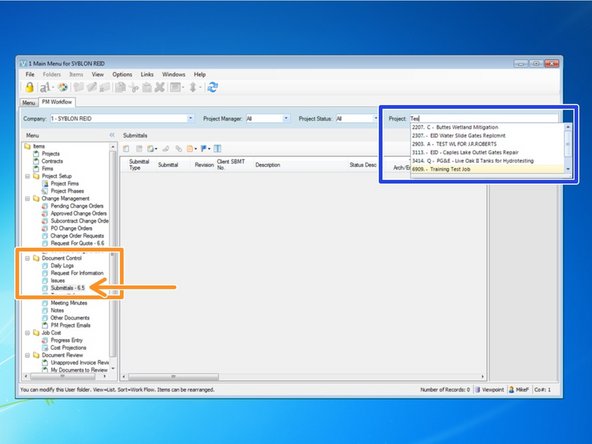
From the "Document Control" folder, select the "Submittals - 6.5" program.
-
Once Submittals are created, this interface will become populated and give the user a quick reference guide to Submittal statuses.
-
In the Project" field, make sure that your project is listed. If not, select the field and begin typing your project's job number.
-
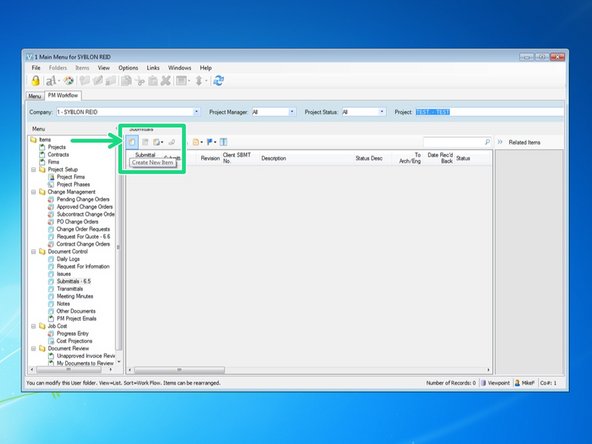
Once you have selected the correct Project, click on the "Create New Item" icon to begin creating your submittal.
-
-
-
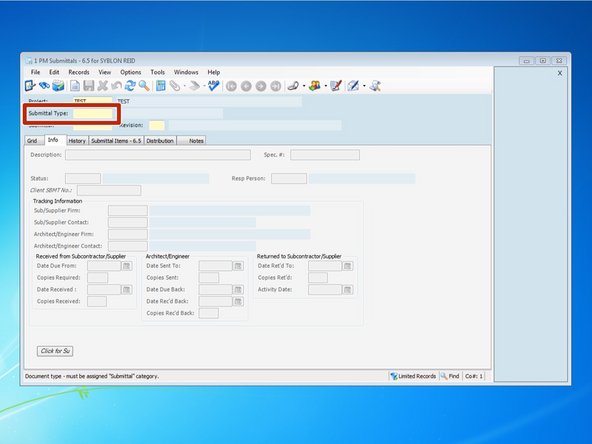
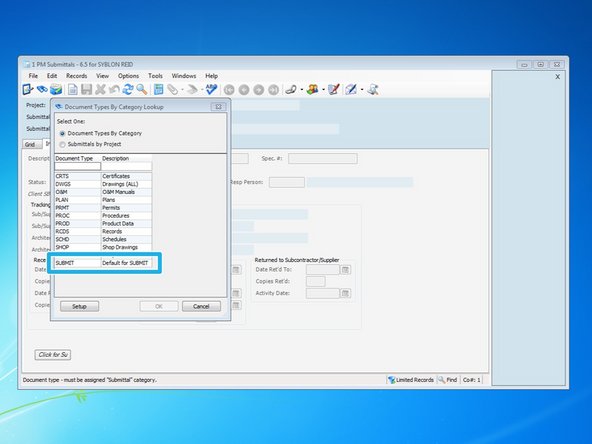
The first entry you need to make is in the "Submittal Type" field. You can type in the correct entry, or press the F4 key to show the Look Up Menu.
-
From the lookup menu, you can select the "Document Type". You should typically select "SUBMIT" for the default description. This will prevent you from having multiple Document Types with the same submittal number.
-
-
-
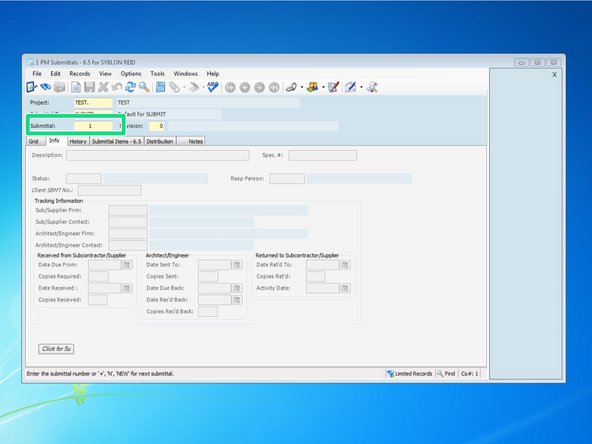
In order to create the record, you need to give your submittal a number. In order to create a Submittal Log prior to creating your submittals, you can either number your submittals numerically in order, or if you know what the actual submittal number will be, you can enter that as well. Your submittal number can be alpha-numeric
-
When creating your submittals, Viewpoint will automatically predict and default to the next available number.
-
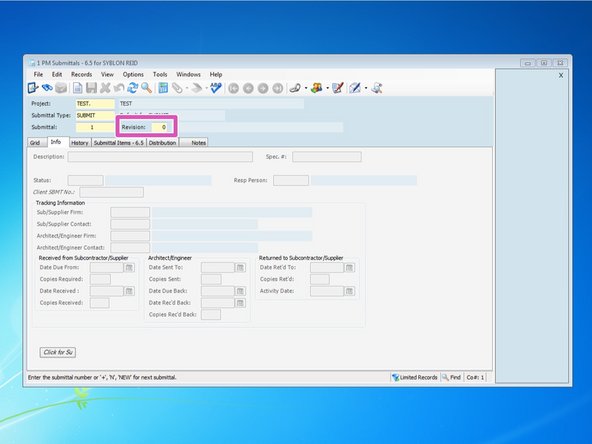
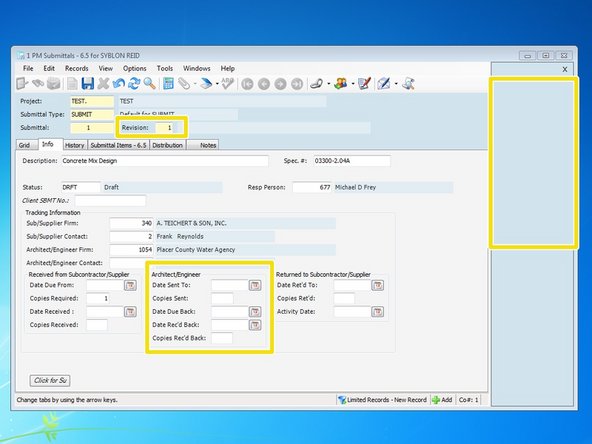
The revision number should be "0" for new submittals. If creating a resubmittal from a previously created submittal, you can change this to what revision it is.
-
-
-
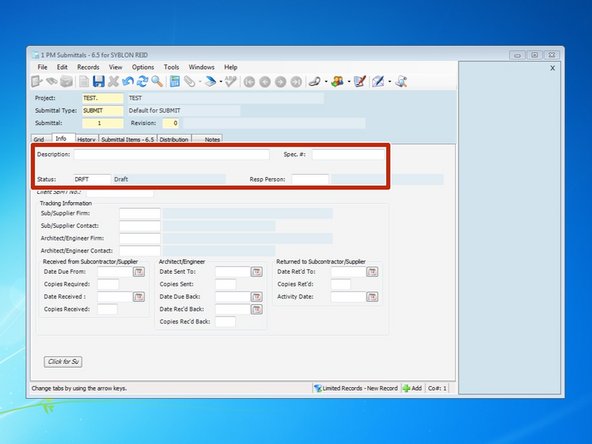
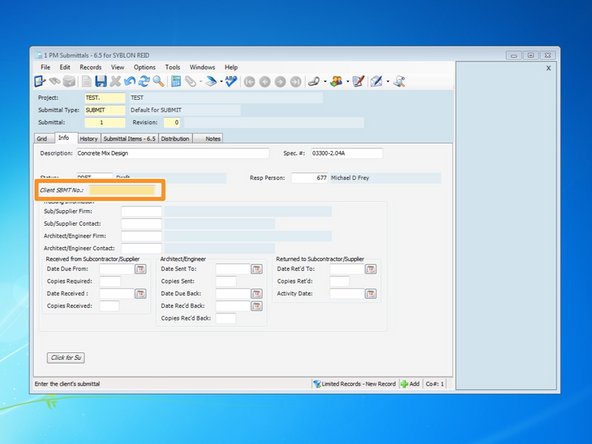
Enter in the desription of the submittal, the spec number for the submittal, the Status, and the responsible person.
-
The "Status" and "Resp Person" field are look up fields, so if you don't know the correct input, you can hit the F4 key to see a list of available options.
-
In the "Client SBMT No", put the number you will want the owner to use as a reference for this submittal. This will be the submittal number that appears on the submittal cover sheet.
-
-
-
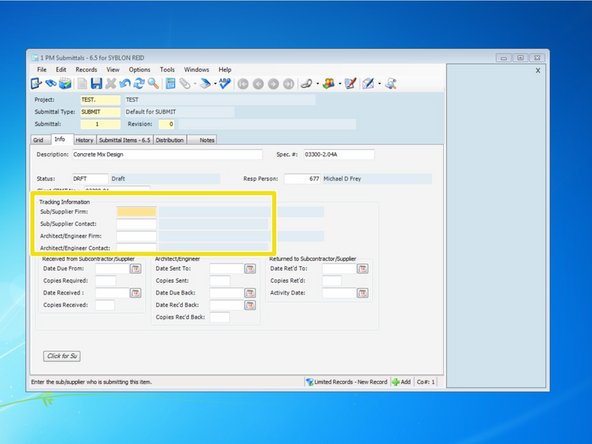
You can add the firm and contact that your submittal came from as well as the firm and contact that you are sending the submittal to. Select the field you wish to add a firm or contact to and press the F4 key.
-
From the look up table, select the firm or contact and press "OK".
-
If you do not see the Firm or Contact listed in the look up tables, you will need to add them to your project's firm list. For help on this, see "Adding Firms and Contacts to Your Project".
-
-
-
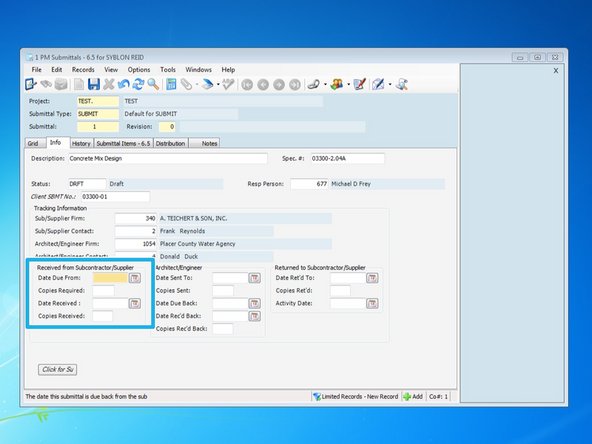
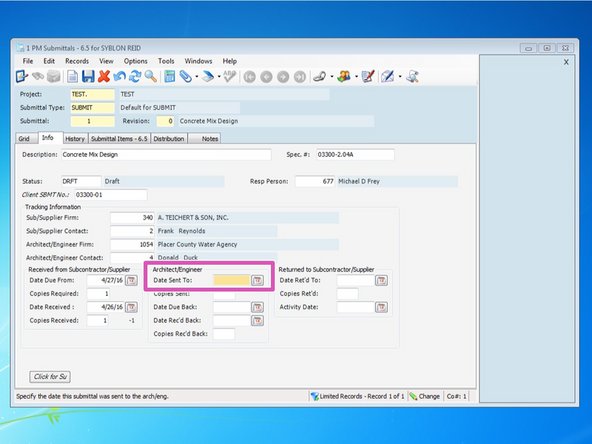
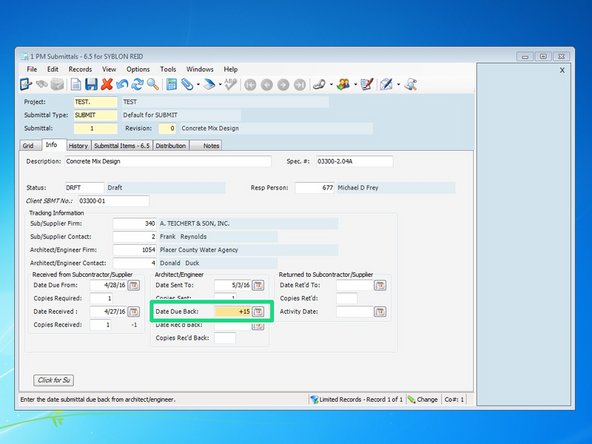
You can then add the dates to the fields shown.
-
The date that you enter in to the "Date Sent To:" field will be the date that appears on the submittal.
-
Wen entering in dates, you can type them in, select them from the calendar icon, or type in the + symbol and the amount of days from today that the submittal is due back. Viewpoint will count the days in calendar days.
-
Entering a date in the "Date Due Back:" field will allow Viewpoint to track the submittal and alert you when the submittal is past due.
-
-
-
To add an attachment, click on the drop down arrow next to the paperclip icon in the toolbar and select "Add Attachment". From there you can select a file that is on the server or on your local hard-drive.
-
Once you select the file you wish to add, it helps to write a brief description of what the attachment is. Then be sure to click the box "Create and Send Email Attachment".
-
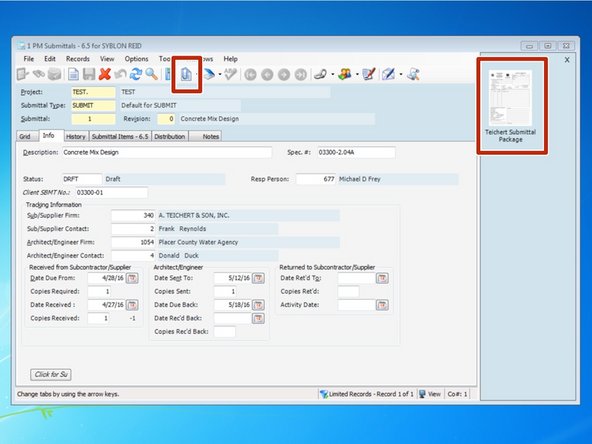
When you have successfully attached an attachment, you will see a piece of paper in the paperclip icon as well as the file on the thumbnail viewer to the right.
-
If you do not see the thumbnail viewer for attachments, you can click on the dropdown button next to the paperclip icon and select "Thumbnail Viewer". Having the "Viewer" enables you to access the attachment quicker to view or to mark up.
-
-
-
You can also add an attachment directly from an email, from your desktop, or from a folder on your computer by simply dragging and dropping the file directly on the Viewpoint screen.
-
-
-
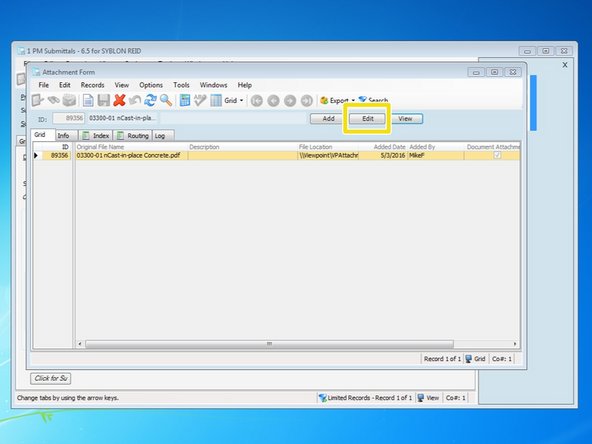
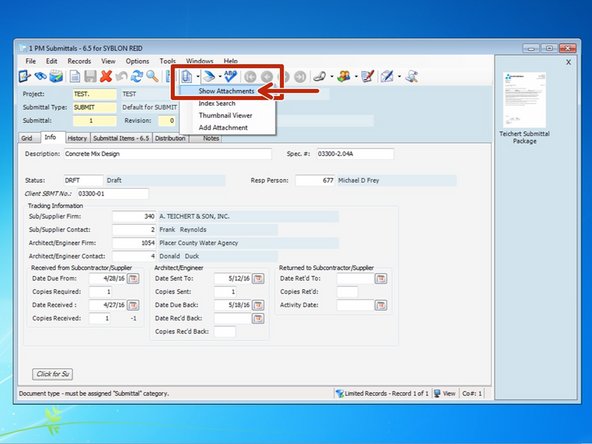
If you add an attachment by dragging and dropping the file, you can give it a description by clicking on the paperclip icon and selecting "Show Attachments".
-
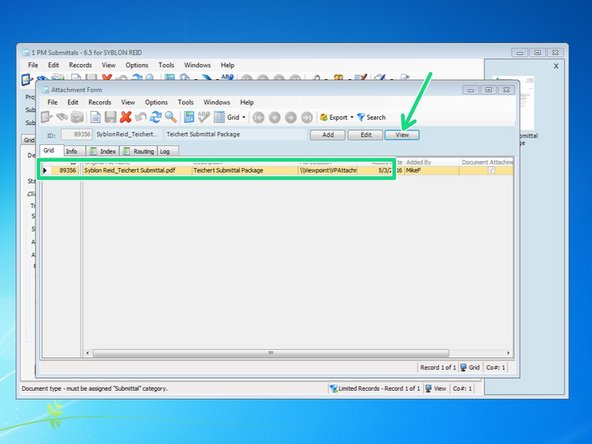
From the Attachment Form, select the attachment you want to edit and click "Edit".
-
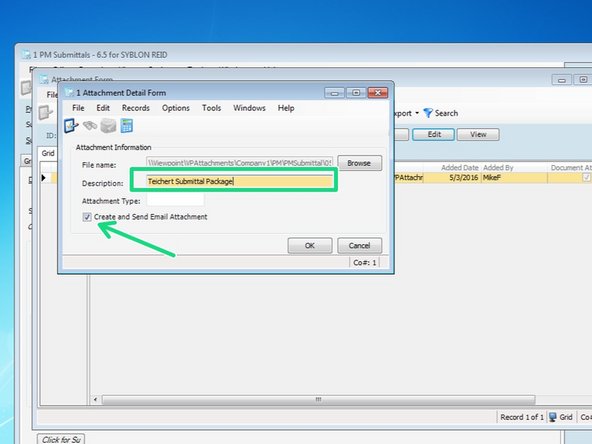
Include a brief description of what the attachment is and ensure that the box is checked for "Create and Send Email Attachment". This will allow you to attach the this attachment to the submittal when it is sent to the Owner or Engineer.
-
When the final submittal is created and sent, it is created in a PDF file. Some file types have a hard time converting to PDF in the final process. It is best to attach files that are either in Word or PDF formats.
-
-
-
To make modifications to an attachment, such as add annotations like arrows or clouds, click on the dropdown arrow next to the paperclip icon and select "Show Attachment".
-
Click on the attachment you want to modify and click "View".
-
If you have the thumbnail viewer on, you can simply double click on the thumbnail of the attachment on the right of the screen to open the attachment.
-
-
-
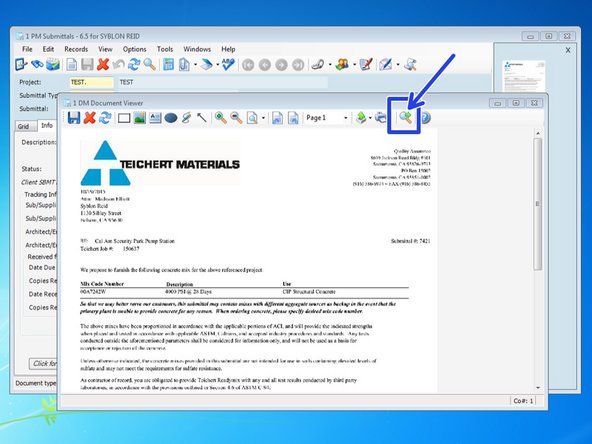
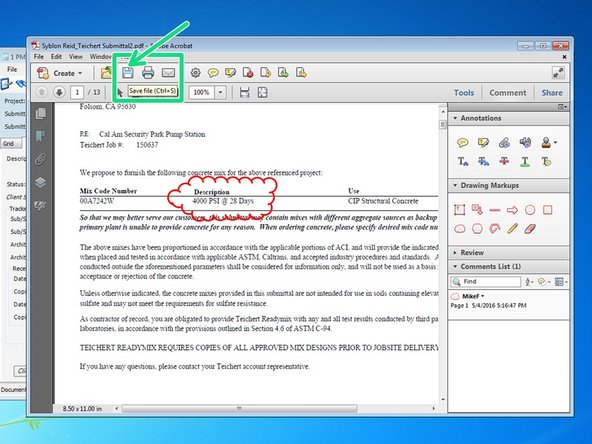
The attachment will open in Viewpoint's default "Document Viewer". It will be easier to make modifications to the document if you open it in your computer's default viewer, which would typically be either Acrobat or Bluebeam. Do that by clicking on the hourglass icon in the toolbar menu.
-
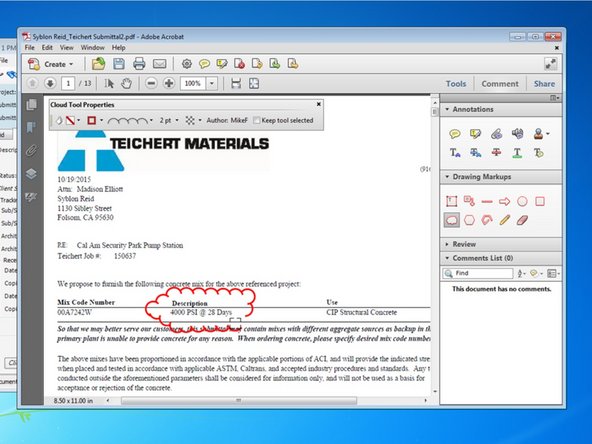
From the default program, you can make any annotations or notes that you made to complete your submittal. Once complete,
-
Once complete with the modifications, you need to press the save button to save the changes to the attachment in Viewpoint. Press the "Save" icon then press yes to when prompted to save the changes in Viewpoint.
-
-
-
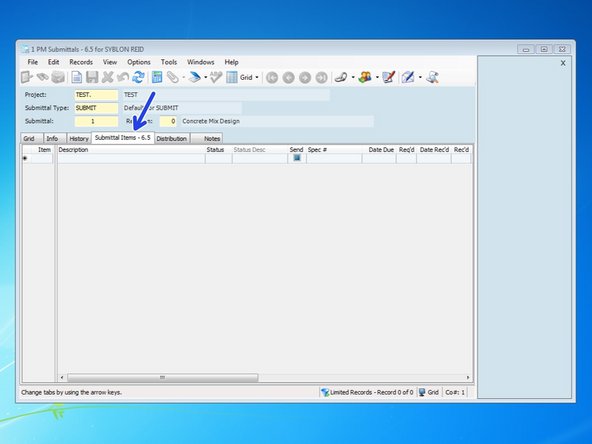
Click on the Submittal Items tab to put a table of all the items being submitted.
-
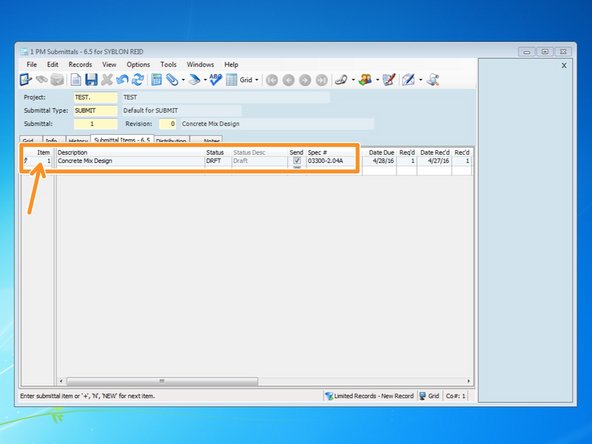
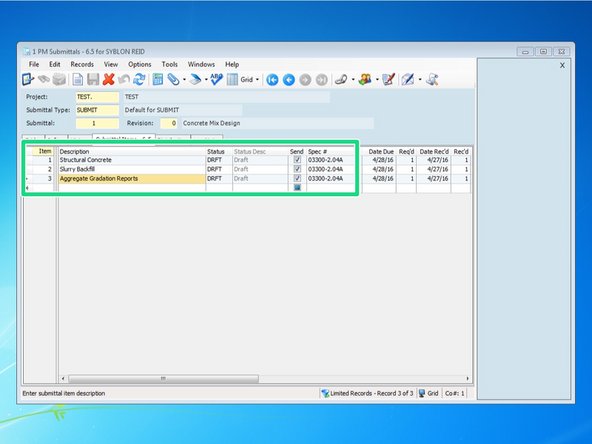
When you create a new "Item" by entering "1" in the Item field, the rest of the data will automatically input the default values from the submittal. You can change or add information based on what items you are submitting.
-
The information entered here is only useful if the Submittal template is set up to show items included in the submittal. Our default Submittal template includes this feature but not all of the Owner's submittal sheets do.
-
-
-
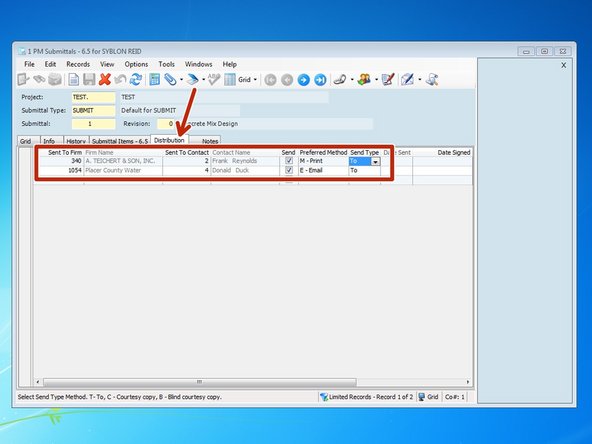
When you click on the distribution tab, the name and contact of the Sub/Supplier firm and Architect/Engineer firm from the info tab will automatically populate.
-
If you don't want to include someone on the distribution of the submittal, you can select the contact and click on the "X" to delete the record.
-
-
-
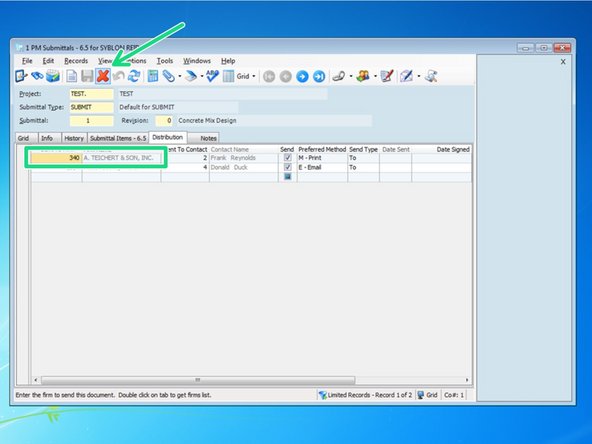
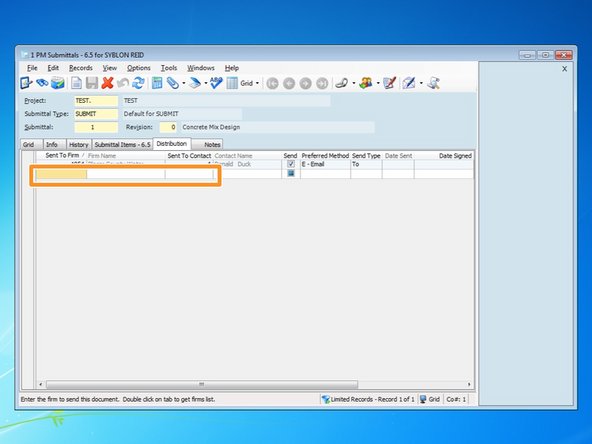
To add a new contact, you first need to select the contact's firm. Select the bottom cell under the column "Sent To Firm". If you know the Firm code, you can enter it or you can press the F4 key to show Viewpoint's look up table.
-
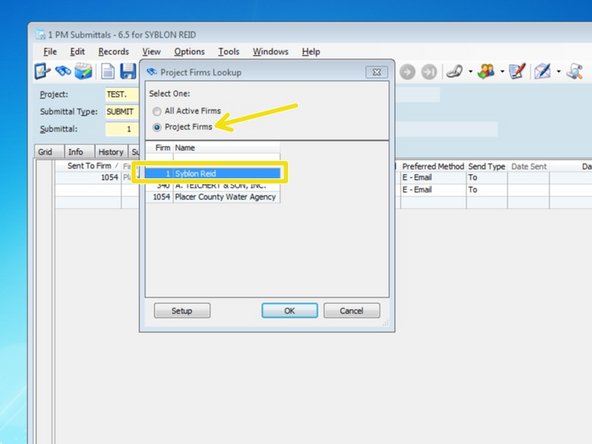
From the look up table, select "Project Firms", then select the Firm of the contact you wish to add and press "OK". If you do not see the firm listed, you will need to add the firm and contact to your list of Project Contacts. For help on this issue, see "Adding Firms and Contacts to Your Project".
-
Once your firm is selected, you can either type in the code for your Contact within that Firm, or press the F4 key and select the contact from the look up menu.
-
-
-
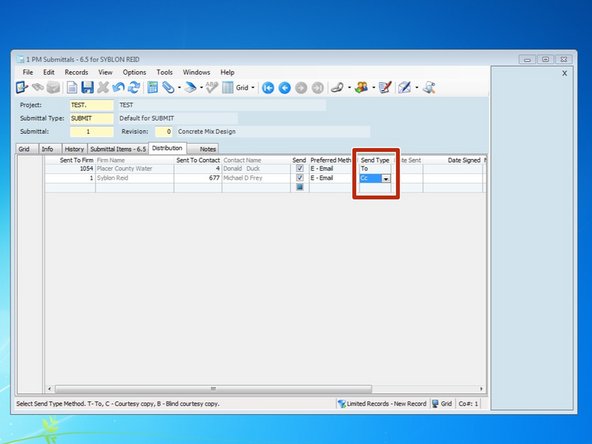
If the submittal is going to be emailed, all contacts will automatically be added to the Send Type "To". You can select the drop down menu and change any recipients to Cc or Bcc.
-
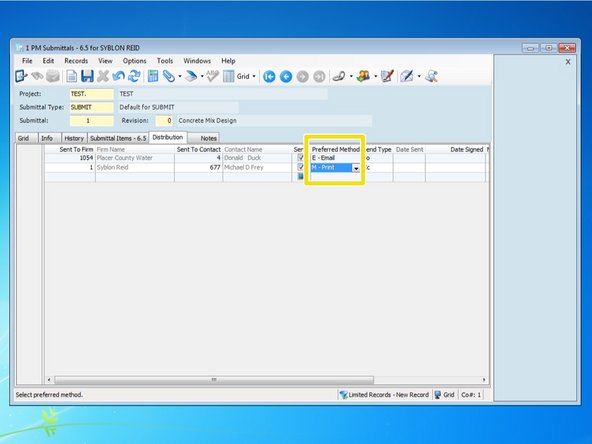
There is a drop down menu for "Preferred Method". This will automatically default to the preferred method of receiving information set up when setting up the contact. You can change this to "Print" if perhaps you are turning in hard copies of submittals. When you press "Send" to deliver the submittal, it will be sent to your default printer.
-
-
-
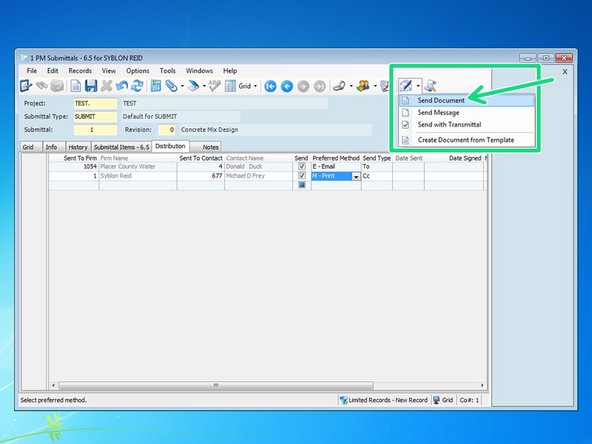
Once these steps are complete, you can finalize and deliver the submittal. From any of the tabs, select the drop down arrow next to the pen and envelope icon and select "Send Document".
-
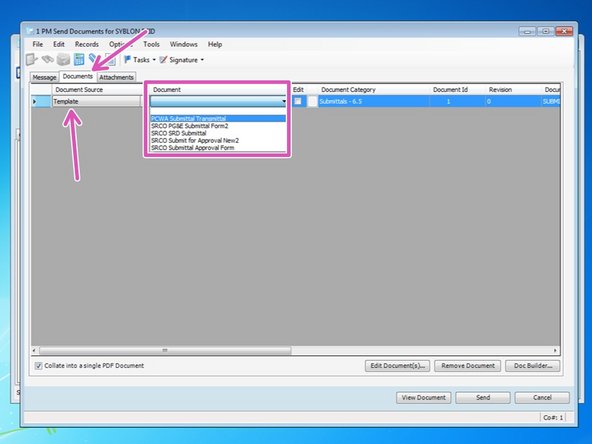
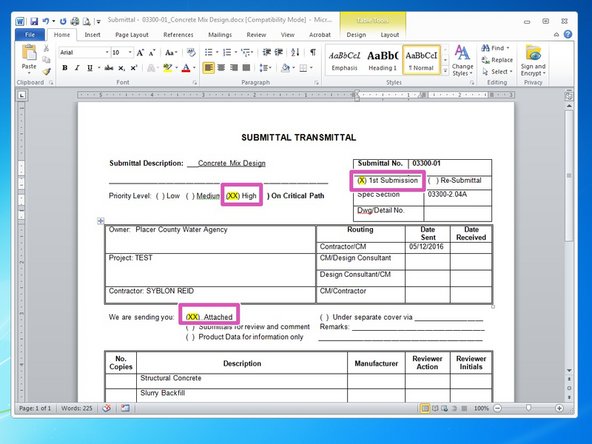
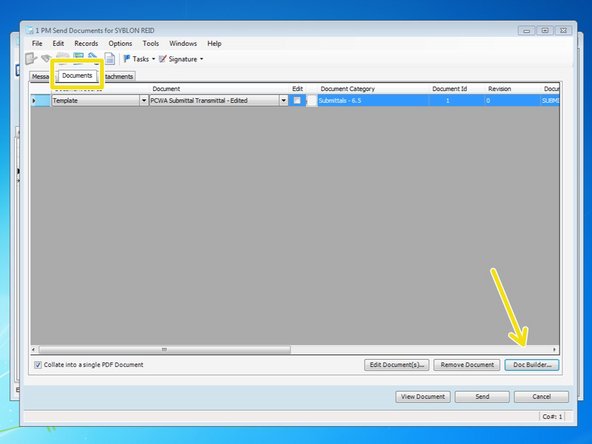
From the "Documents" tab, you will first want to select a cover sheet for your submittal. Under the "Document Source" column, select "Template". Under the document, select the cover sheet that you want to use for your submittal.
-
Owner's may have their own submittal cover sheet they want us to use. Talk to the Administrator about making a customized template so you can populate the information onto your owner's forms.
-
If you have a submittal cover sheet that requires special input fields to be filled out, such as notes or certifications, you can do that by clicking the check box under the "Edit" column and then selecting the "Edit Document" button near the bottom of the window.
-
-
-
The template will open in a word file. You can make any adjustments you may need to the cover sheet. Some owner's have on their cover sheet priority levels, certifications, and comments that may need to be acknowledged.
-
Once complete with your edits, just press the "Save" icon and close the document and those changes will automatically be saved within Viewpoint for this entry.
-
-
-
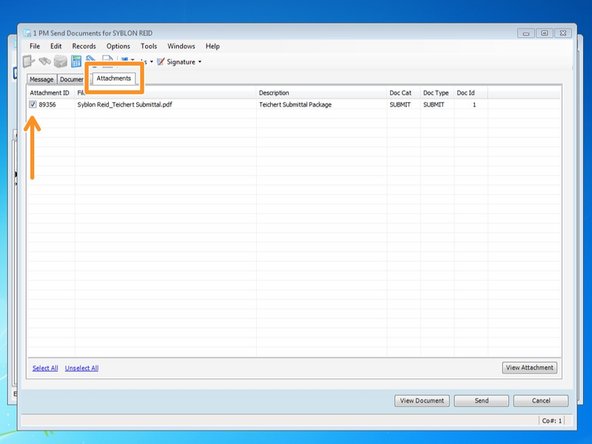
From the "Attachments" tab, select any of the attachments that you wish to include with this submittal.
-
If you have multiple attachments, you can rearrange them in the Doc Builder to put them in the order you want them in.
-
From the "Document Order" tab, you can drag and drop multiple attachments to rearrange them in to the order you want them and then press ok.
-
-
-
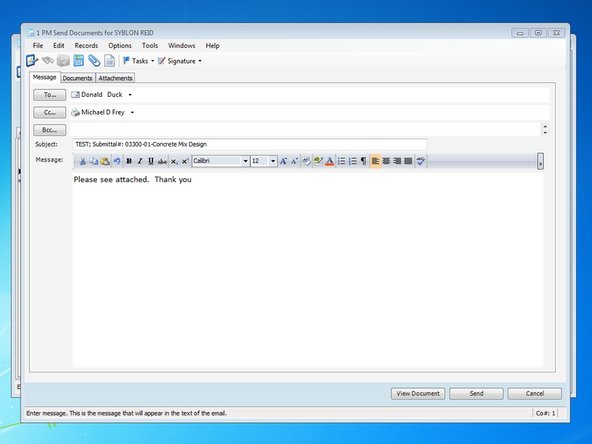
The submittal is sent to the Oqner via the Message tab. If you are emailing the submittal and wish to include a message, you can do so in the body of the email. If you want to review your submittal one last time before it gets delivered, press the "View Document" button at the bottom of the window. When complete, press the "Send" button.
-
If the recipient of the submittal has a preferred method of "Print", the whole document will be sent to your default printer when you press the "Send" button.
-
-
-
Once the submittal is created and sent to the recipient, Viewpoint will create a new attachment of what was sent. If you notice, there is now a new thumbnail in the thumbnail viewer of the whole submittal package.
-
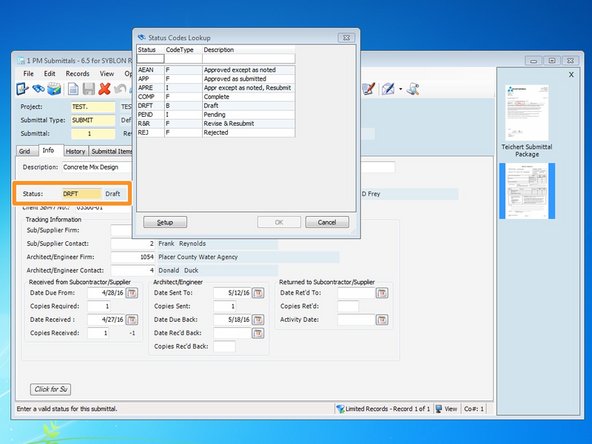
Once the submittal is sent, go back to the info tab and change the status so Viewpoint can help track the submittal. Once you select the Status field, press the F4 key and select the correct status from the look up list . Change the status to "Pending" while it is in review.
-
-
-
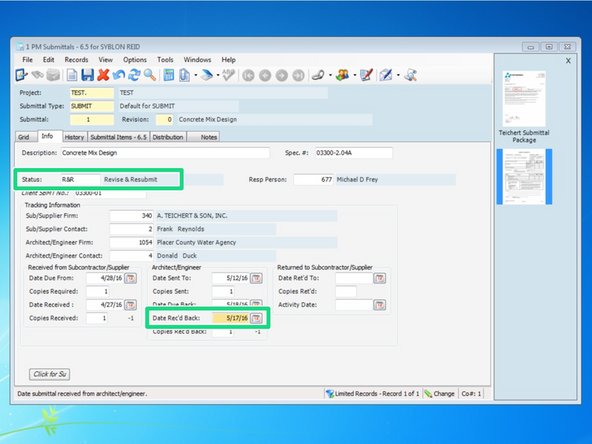
When you receive the submittal back, you need to once again change the status based on the review comments of the submittal. Also, be sure to enter the date that the submittal was returned.
-
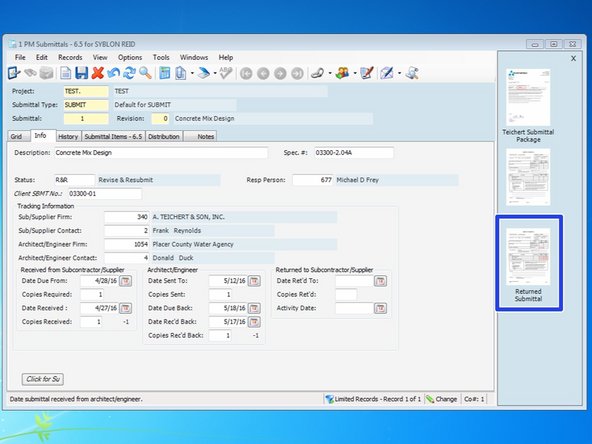
Be sure to attach the returned submittal back to the record so it can be easily accessible.
-
-
-
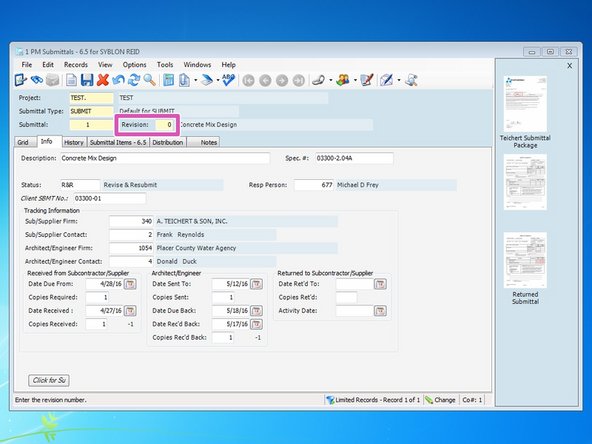
If you need to create a revision, the "Submittal" number will be the same but you can change the "Revision" number. Open up the original submittal, select the "Revision" field, and enter in the next revision Number. This field is a numeric field so revisions in this field need to be numbers, not letters.
-
If the Client requires the submittal revisions to be letters, you can still make it a letter under the "Client SBMT No" field.
-
When creating the revision, information from the original submittal will be populated. Also, since it is a new entry, all of the original attachments from the original submittal will stay with the original entry and not carry over to the revision. Change any information from the original submittal as needed and input any new information.
-