-
-
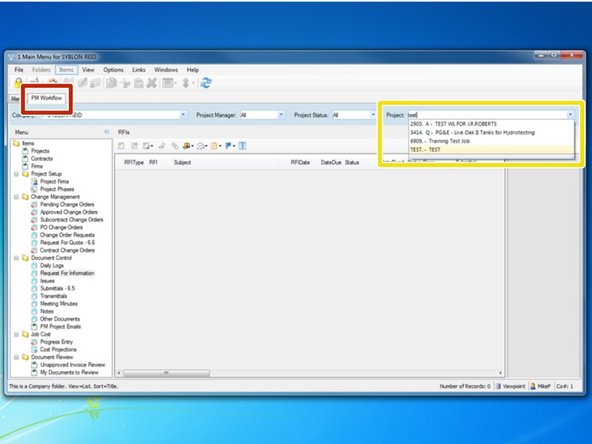
Log in to Viewpoint
-
-
-
Select the "PM Workflow" tab
-
From the "Project" menu, begin typing in your job name or job number and select your project.
-
-
-
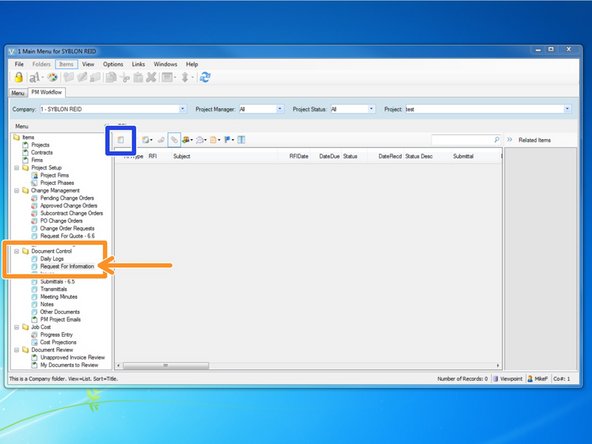
From the "Document Control" folder, select the "Request For Information" program.
-
Once RFIs are created, this interface will become populated and give the user a quick reference guide to RFI statuses.
-
To create a new RFI, select the "Create New Item" icon.
-
-
-
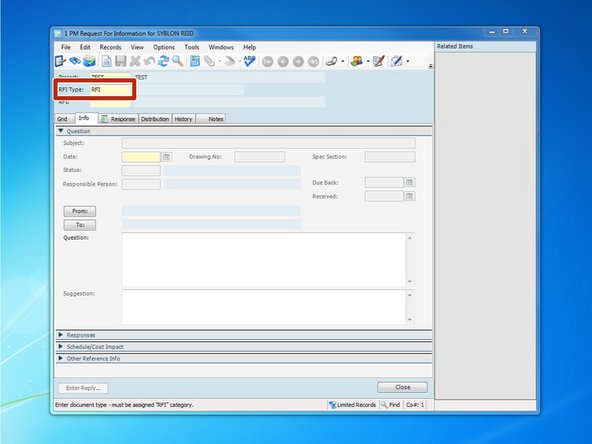
"RFI Type:" should be RFI.
-
In the "RFI Type:" field, you can press the F4 key to pull up a look up menu of available options.
-
-
-
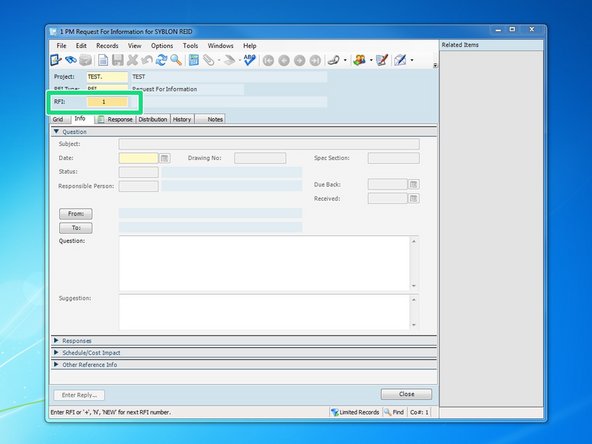
When you click in the "RFI:" field, Viewpoint will automatically create the next numerical value for your RFI. If the value is incorrect, you can change it.
-
When the value for the RFI is correct, press the TAB key to move to the Subject field.
-
The value for an RFI can be Alpha/Numeric
-
You can press the F4 key to pull up the look up function and review previously created RFIs.
-
-
-
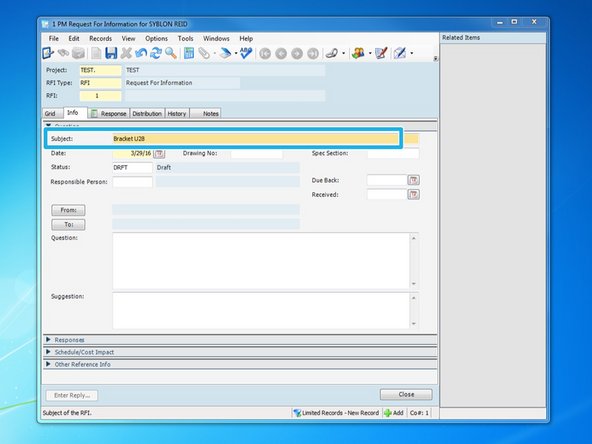
Type in a brief subject description of the RFI
-
Once completed, you can either press the TAB key to move on to the next step or click on the next field with your mouse.
-
-
-
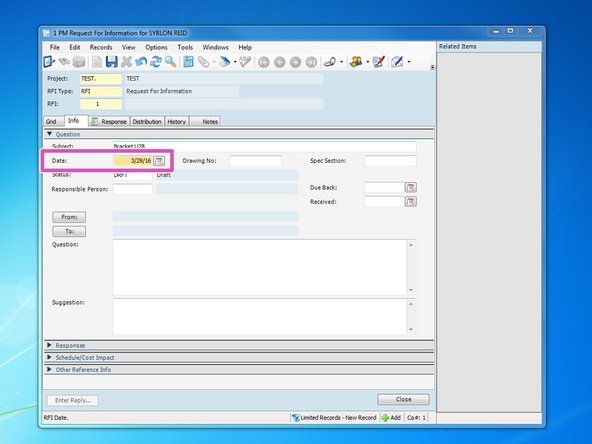
Type in the date that you will send the RFI to the recipient.
-
Clicking on the Calendar icon will pull up a calendar that you can select the day from as well.
-
Once completed, you can either press the TAB key to move on to the next step or click on the next field with your mouse.
-
-
-
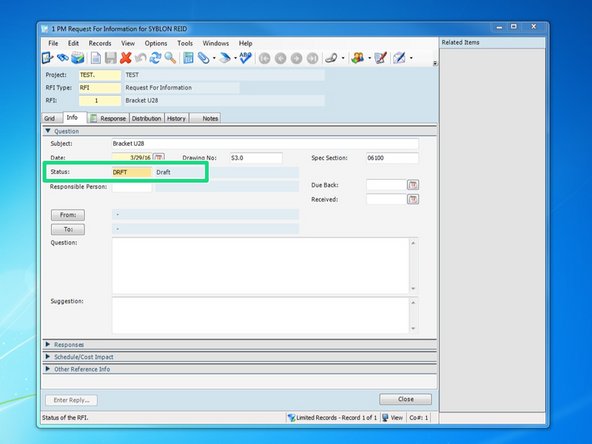
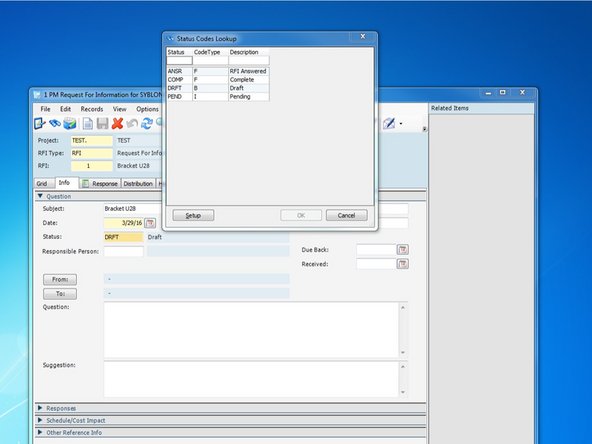
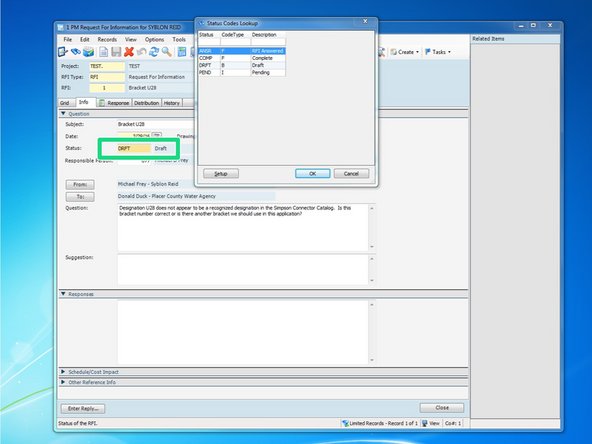
Insert Status type
-
Pressing the F4 key will enable Viewpoint's lookup function and show you a list of different statuses that you must choose from. Typically the RFI is a "DRFT" Draft until it is submitted, then the status can be changed to "PEND" for Pending. Once it is answered, the status can be changed to "ANSR" for RFI Answered.
-
-
-
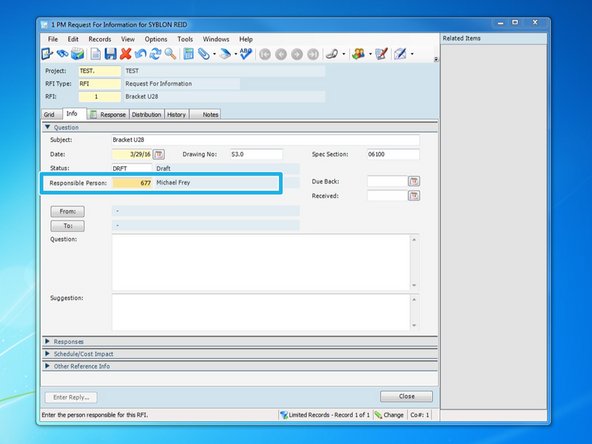
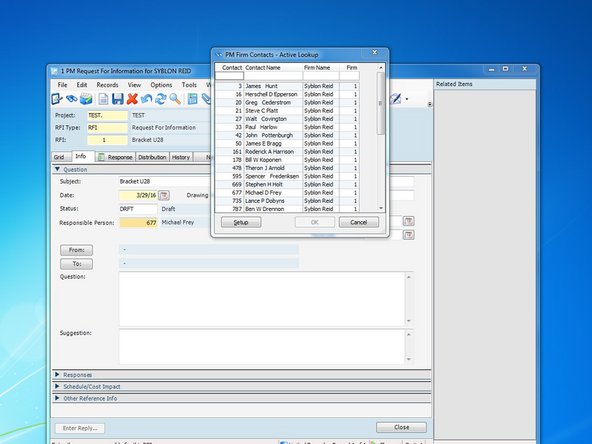
Insert Responsible Person. The input for this field should be the SRC Employee Code Number for the person creating and monitoring this RFI.
-
Pressing the F4 key will enable Viewpoint's lookup function and show you a list of employees and their corresponding Employee Code Numbers
-
-
-
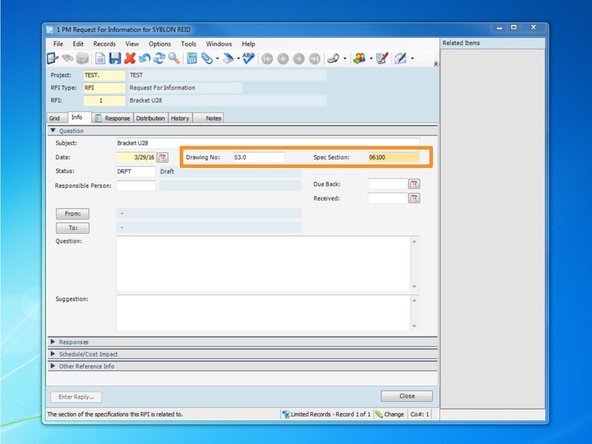
Insert the Drawing Number and Spec Section, if applicable
-
Once completed, you can either press the TAB key to move on to the next step or click on the next field with your mouse.
-
-
-
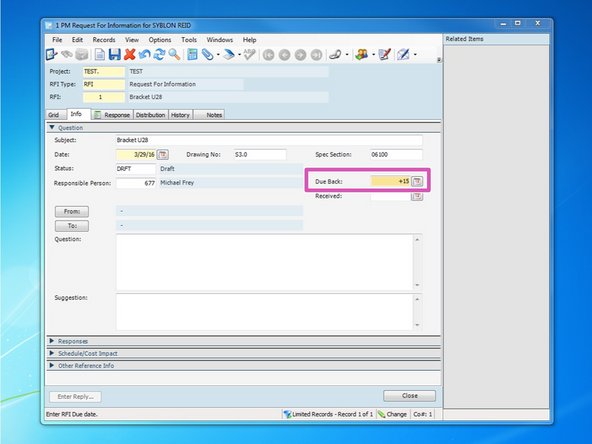
Insert the date you need a response back by. You can manually input the date, you can click on the calendar symbol and select the date, or you can press the + key and input how many days from today you will need a response back from.
-
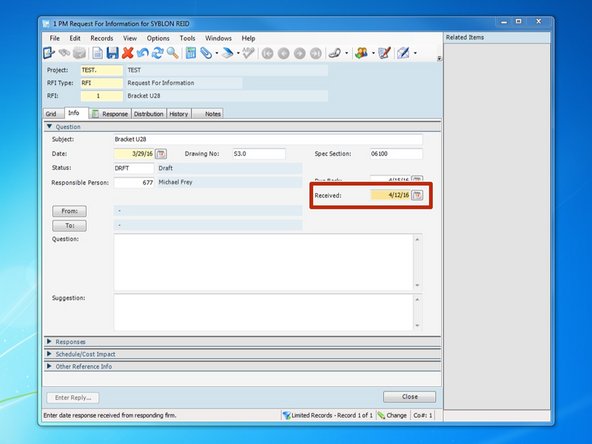
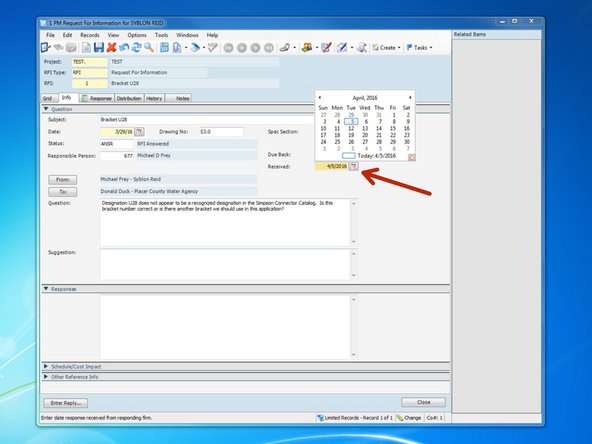
Once you receive a response to the RFI, insert the date that you received the RFI response here.
-
Once you receive the response back and insert the date, you should also remember to go back and change the Status to "ANSR".
-
-
-
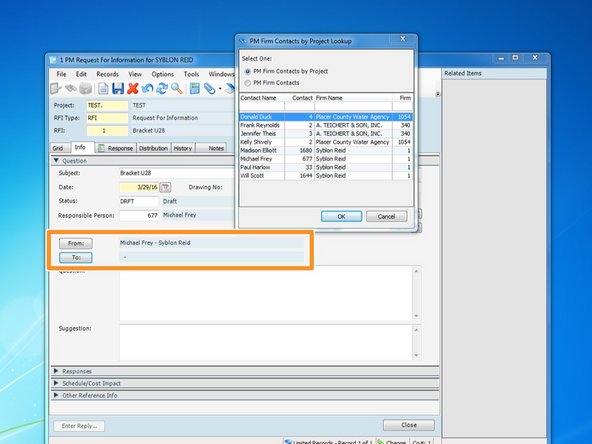
Click on the From and To buttons to select who the RFI will be coming from, and who the RFI will be addressed to.
-
Clicking the buttons will automatically bring up the look up function for your project's Firm Contacts. If you do not see your contact listed, you will need to set them up in the Project Firms program. For help on that, review the training module entitled Adding Firms and Contacts to Your Project
-
-
-
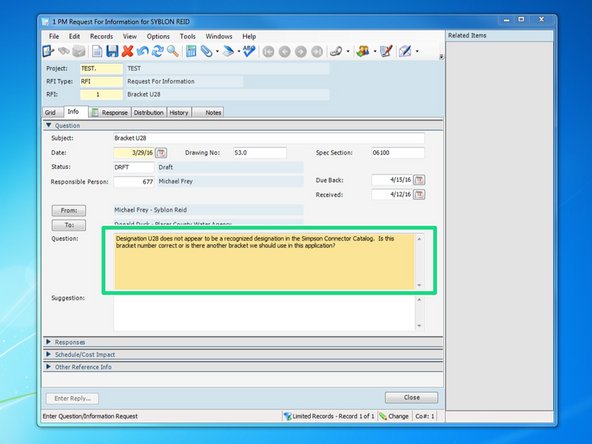
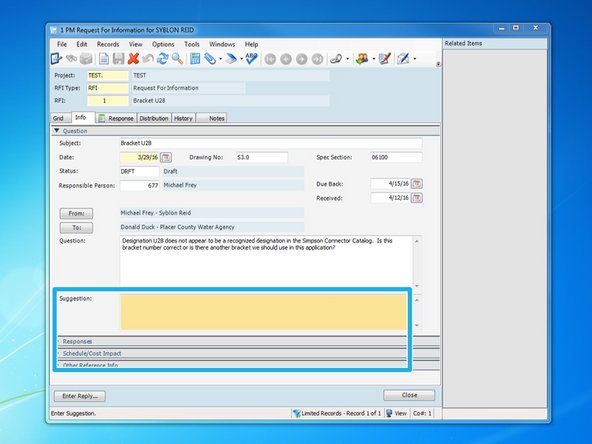
Type your RFI question in this field.
-
-
-
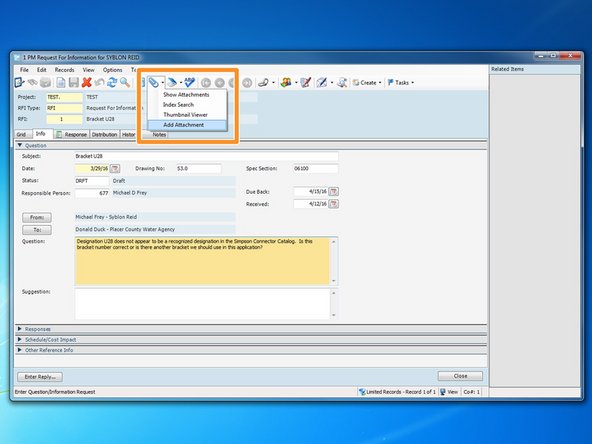
To add an attachment, such as a drawing or photo, you can select the drop down arrow next to the paper clip icon.
-
When Viewpoint "creates" the RFI by combining all the documents in to one PDF, it sometimes has trouble converting some file types to PDFs, such as photos. Sometimes it is best to print the photos or other documents to PDF first, then attach them.
-
-
-
You can also drag and drop attachments. You can drag files from emails or the server and it will save as an attachment to this entry.
-
Note that prior to attaching the file, there is nothing shown under the paper clip icon. Once the file is attached, a piece of paper appears in the paper clip icon. This tells you that there is an attachment to this entry.
-
-
-
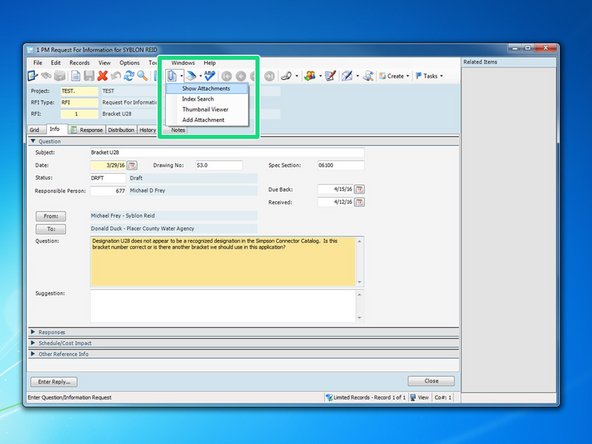
If you want to make modifications to an attachment, such as add text, arrows, cloud, etc., you can do it by clicking the paper clip icon, selecting "Show Attachments".
-
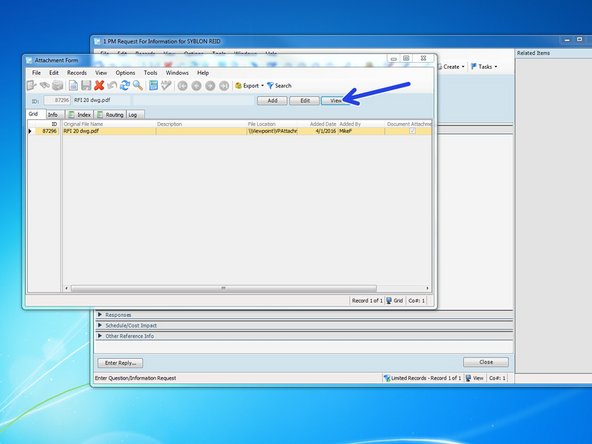
From the list of attachments, click on the attachment you want and click the "View" button. You can also simply double click on the attachment you wish to view.
-
-
-
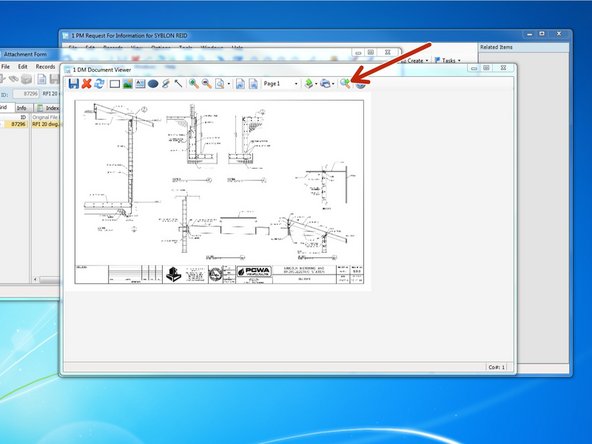
Viewing the document will open it in Viewpoint's "Document Viewer" program. Clicking the magnifying glass icon will open the file in it's original program, such as Adobe or Word.
-
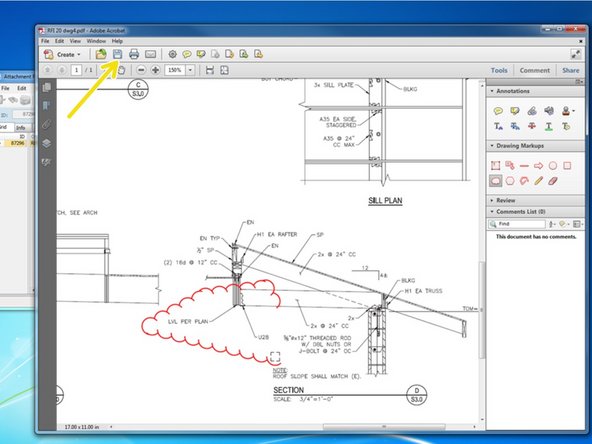
Opening a PDF attachment in Acrobat will allow you to make any edits that are available to you in Acrobat. You can cloud items, add/delete pages, highlight, or add text.
-
Once complete, save the PDF by clicking the Save icon. Viewpoint will prompt you if you want to save the changes. Click yes and all edits will be saved within Viewpoint.
-
-
-
The way our templates are set up, these remaining fields on this tab are typically not used. Custom templates can be made where these fields are utilized if required by an Owner.
-
-
-
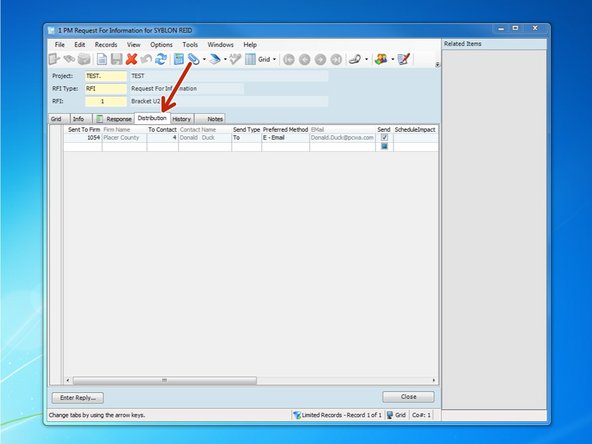
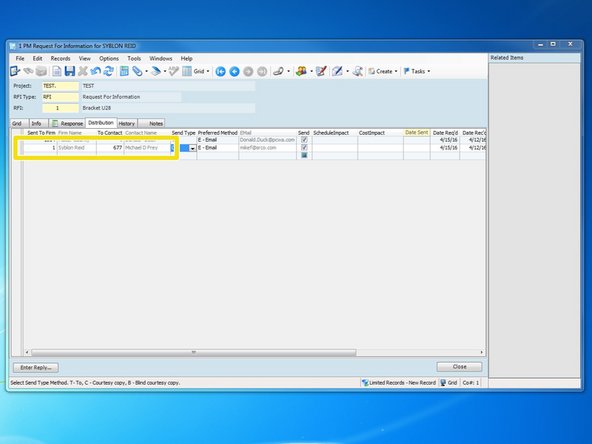
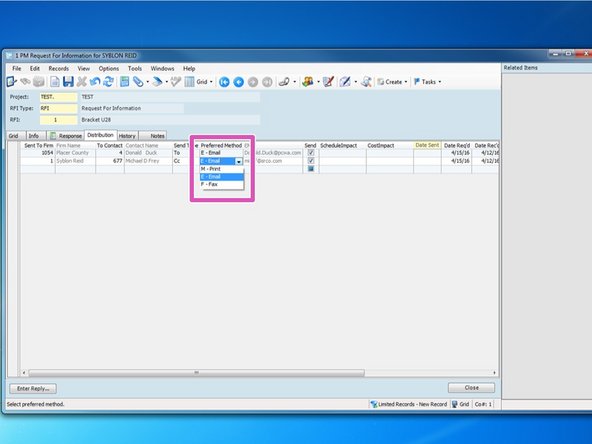
Click on the "Distribution" tab. The contact that was selected as the recipient on the "Info" tab will automatically be filled in on the distribution tab.
-
Insert the "Sent To Firm" and the "To Contact". You can press the F4 key to view the look up feature.
-
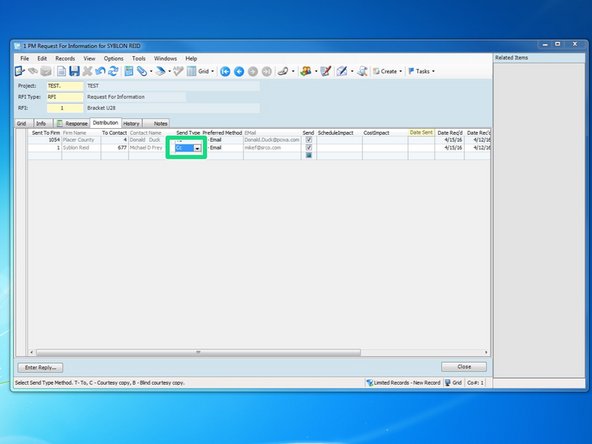
Under "Send Type", you can change whether you want the email addressed or cc'd to the contacts you list.
-
-
-
Under "Send Type", you can change whether you want the email addressed or cc'd to the contacts you list.
-
The field "Preferred Method" will automatically populate based on what was selected for the contact's preferred method when setting up the contact. If you select "Print", the RFI will be sent to your default printer.
-
-
-
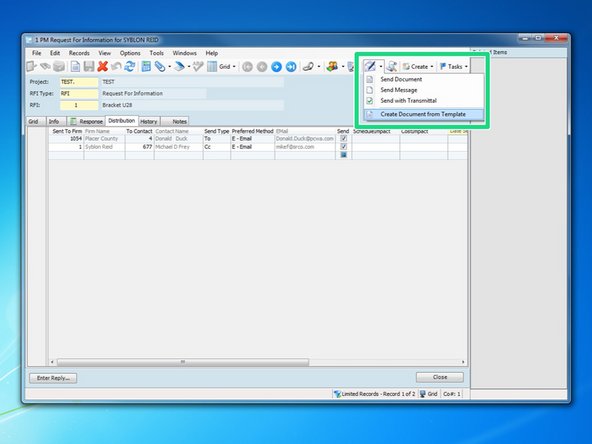
Once the information for the RFI is entered, we need to create the RFI document. Do this by clicking the drop down menu next to the "Create and Send" icon, labeled as an envelope., and selecting "Create Document from Template".
-
-
-
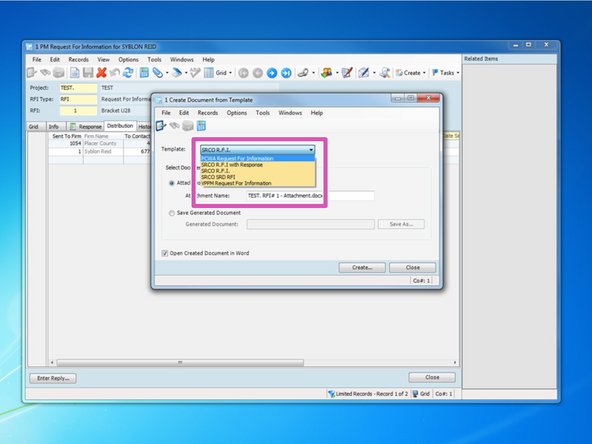
From this menu, you need to choose the template that your want the RFI to be created on.
-
If you are working for a client that requires RFIs on their specific forms, templates can be made on their form. You can also select "SRCO R.F.I" to put it on a standard SRC form.
-
-
-
After selecting which template you want to use, the template file will automatically open. You can edit this form to make it fit on one page and mark any fields that the Owner requires you to mark, such as a priority level or who initiated the RFI.
-
Once all the fields are filled in, press the save icon. You will be asked if you want the file saved in Viewpoint; click yes. This template will be created and saved as an attachment to attach to an email or send to a printer in the next step.
-
-
-
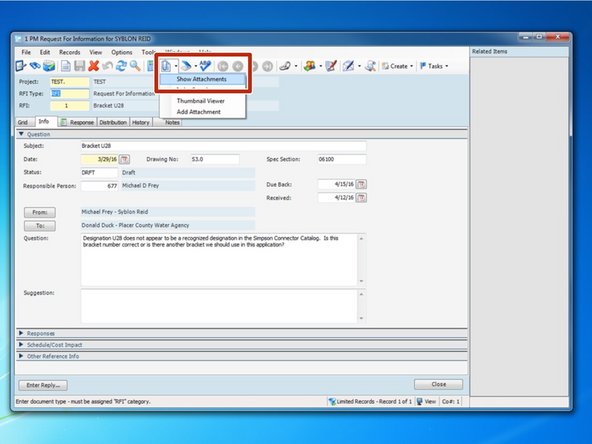
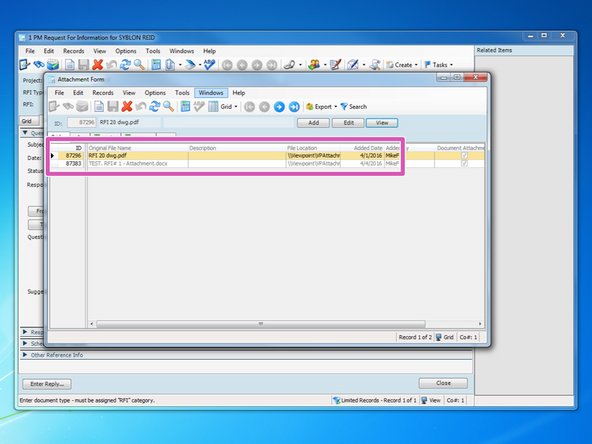
Once the RFI template is completed, you can click on the paperclip icon to view the attachments associated with this entry.
-
In this example, the first entry is the marked-up drawing, and the second attachment is the RFI template.
-
Every time you create a template, each one will appear as an attachment. If, when creating your template, you notice a mistake with one of your entry fields, you will still need to go here to delete the template. If you do not delete it, it will show up as a possible attachment when you go to email the RFI.
-
-
-
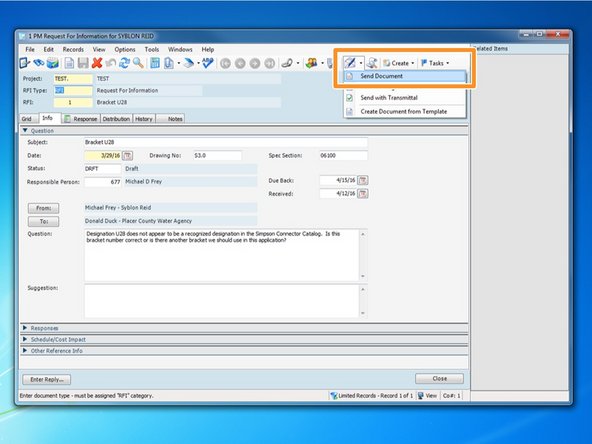
To send the RFI, click on the "Create and Send" Icon and click "Send Document".
-
-
-
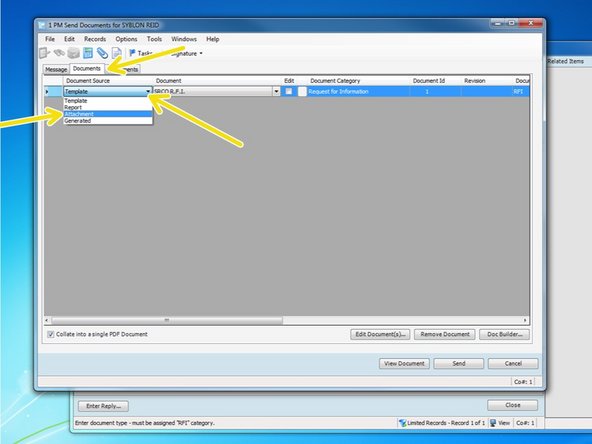
From the "Documents" tab, select the drop down arrow for "Document Source, and select "Attachment".
-
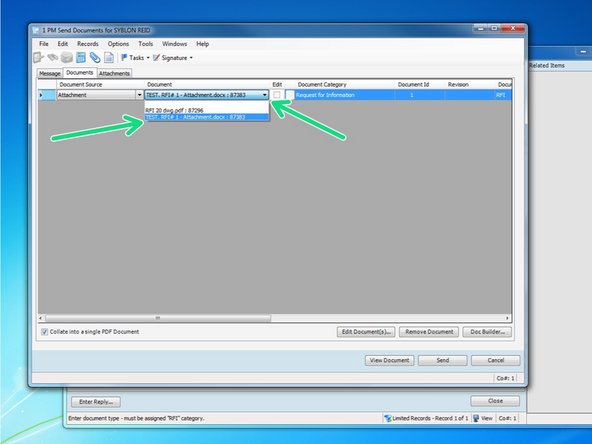
Click the drop down arrow for "Document" and select your RFI document.
-
-
-
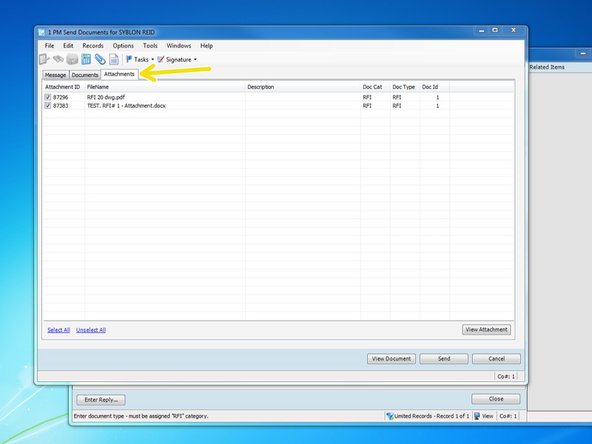
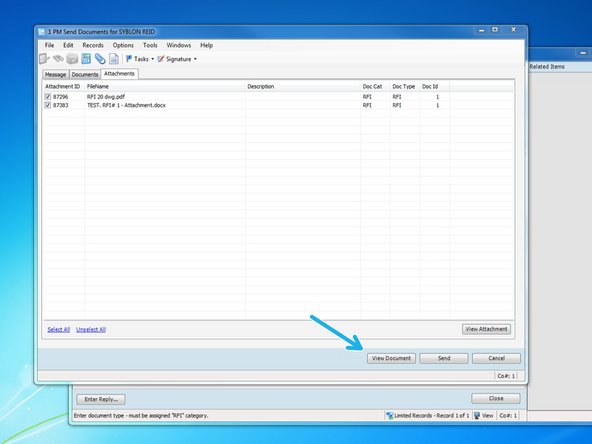
Click on the "Attachments" tab. Make sure that the file you attached when entering in the RFI information is checked. Additionally, make sure any other documents that may have been created or attached aren't checked if you don't want them to be sentout as well.
-
Click on "View Document" to preview what the entire RFI will look like when it is delivered. Your RFI will be automatically created in to a single PDF file.
-
If you select "View Document" and Viewpoint isn't able to preview it, it may be occurring because of the type of file your attachment it. It is best to try and attach either Word or PDF documents.
-
-
-
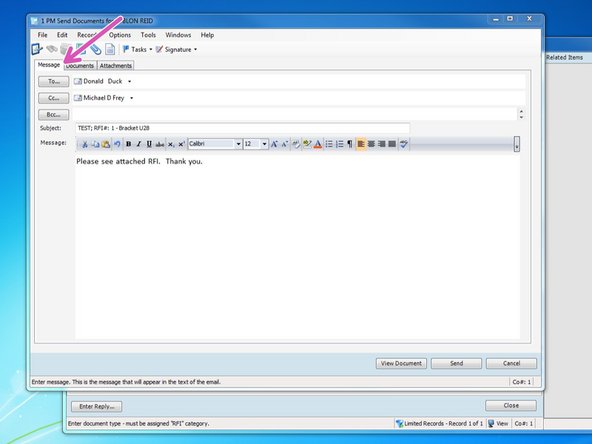
Click on the "Message" tab. From here, you can add a message to the recipient if you are sending via email.
-
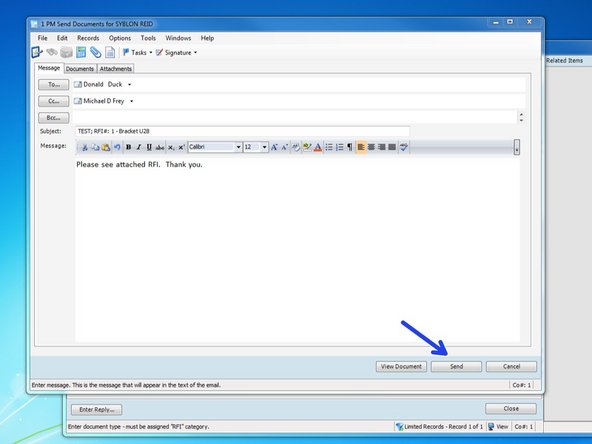
Once complete, click on the "Send" button to send your RFI. If your recipient is selected to receive the RFI via email, Viewpoint will automatically send the email. If your recipient is selected to receive the RFI via Print, your RFI will be sent to your default printer.
-
Emails are sent from your email account through Viewpoint, but they will not show up in your local "Sent" folder. It is good to cc: yourself so you know the RFI was sent.
-
Once you send your RFI, the compiled RFI will now show up as another attachment for this RFI's entry.
-
-
-
Once you receive the RFI response, You can go back to the RFI's "Info" tab, select the "Status" cell, Press F4, and select the new status "ANSR" for an Answered RFI.
-
You can then select the calendar icon next to the "Received" date to select the day you received the RFI.
-
-
-
If you get an RFI response through an email, or if you scan a paper copy of a response, you should add the response to your attachments by dragging and dropping the attachment over the RFI entry, similar to adding the drawing in STEP 15
-
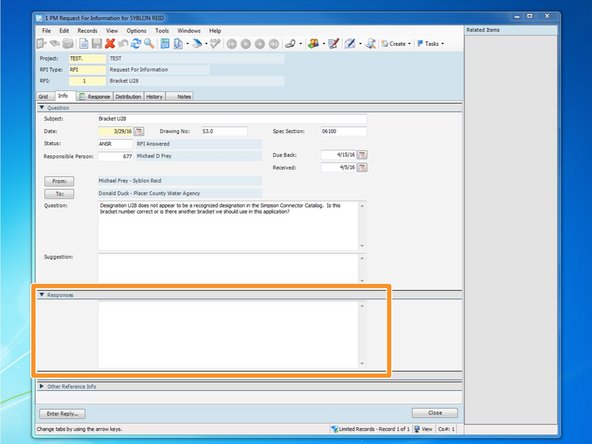
For quicker reference without having to pull up the attachment, you can also type in the response under the "Response" drop down field.
-